Workflow stages and operational defaults
Configurations > Operations > Workflow defines the stages repair orders move through on the Workflow board. This page is the reference for that tab: what a stage is, how to add, recolor, rename, reorder, and remove stages, and what each change does to repair orders already on the board. For the first-time pass through this tab, see New-shop onboarding. Moving work across the board day to day is covered in the Repair Order Workflow section of this knowledge base.
Changes on this tab save as you make them. There is no Save button, and every change applies to the live board immediately. Editing stages requires the workflows permission; see Assign Shop Roles, shop access, and User Permissions for who has it.
What a workflow stage is
A workflow stage is one step in your shop's process, shown as a section of the Workflow board. It tracks where the vehicle sits operationally; the repair order's financial status (estimate sent, invoiced, paid) is tracked separately. Moving a card between stages never changes what the customer owes, and collecting a payment never moves a card.
Every open repair order sits in exactly one stage. A new repair order starts in the first stage, whether it was created directly or converted from an estimate. There is no "done" stage to drag finished work into: once the vehicle is marked picked up, the visit is closed without a sale, or the repair order is deleted, it leaves the board on its own, from whatever stage it was in. Finalizing, paying, or refunding the Invoice does not remove the card.
Stages also feed the customer's view. The customer portal reads the board by position: a repair order in the first stage shows as checked in, one in the last stage as ready for pickup, and anything between as in service. That is why the first and last stages are locked, as described below.
The default stages
New shops inherit the organization's default board. Out of the box that is eight stages:
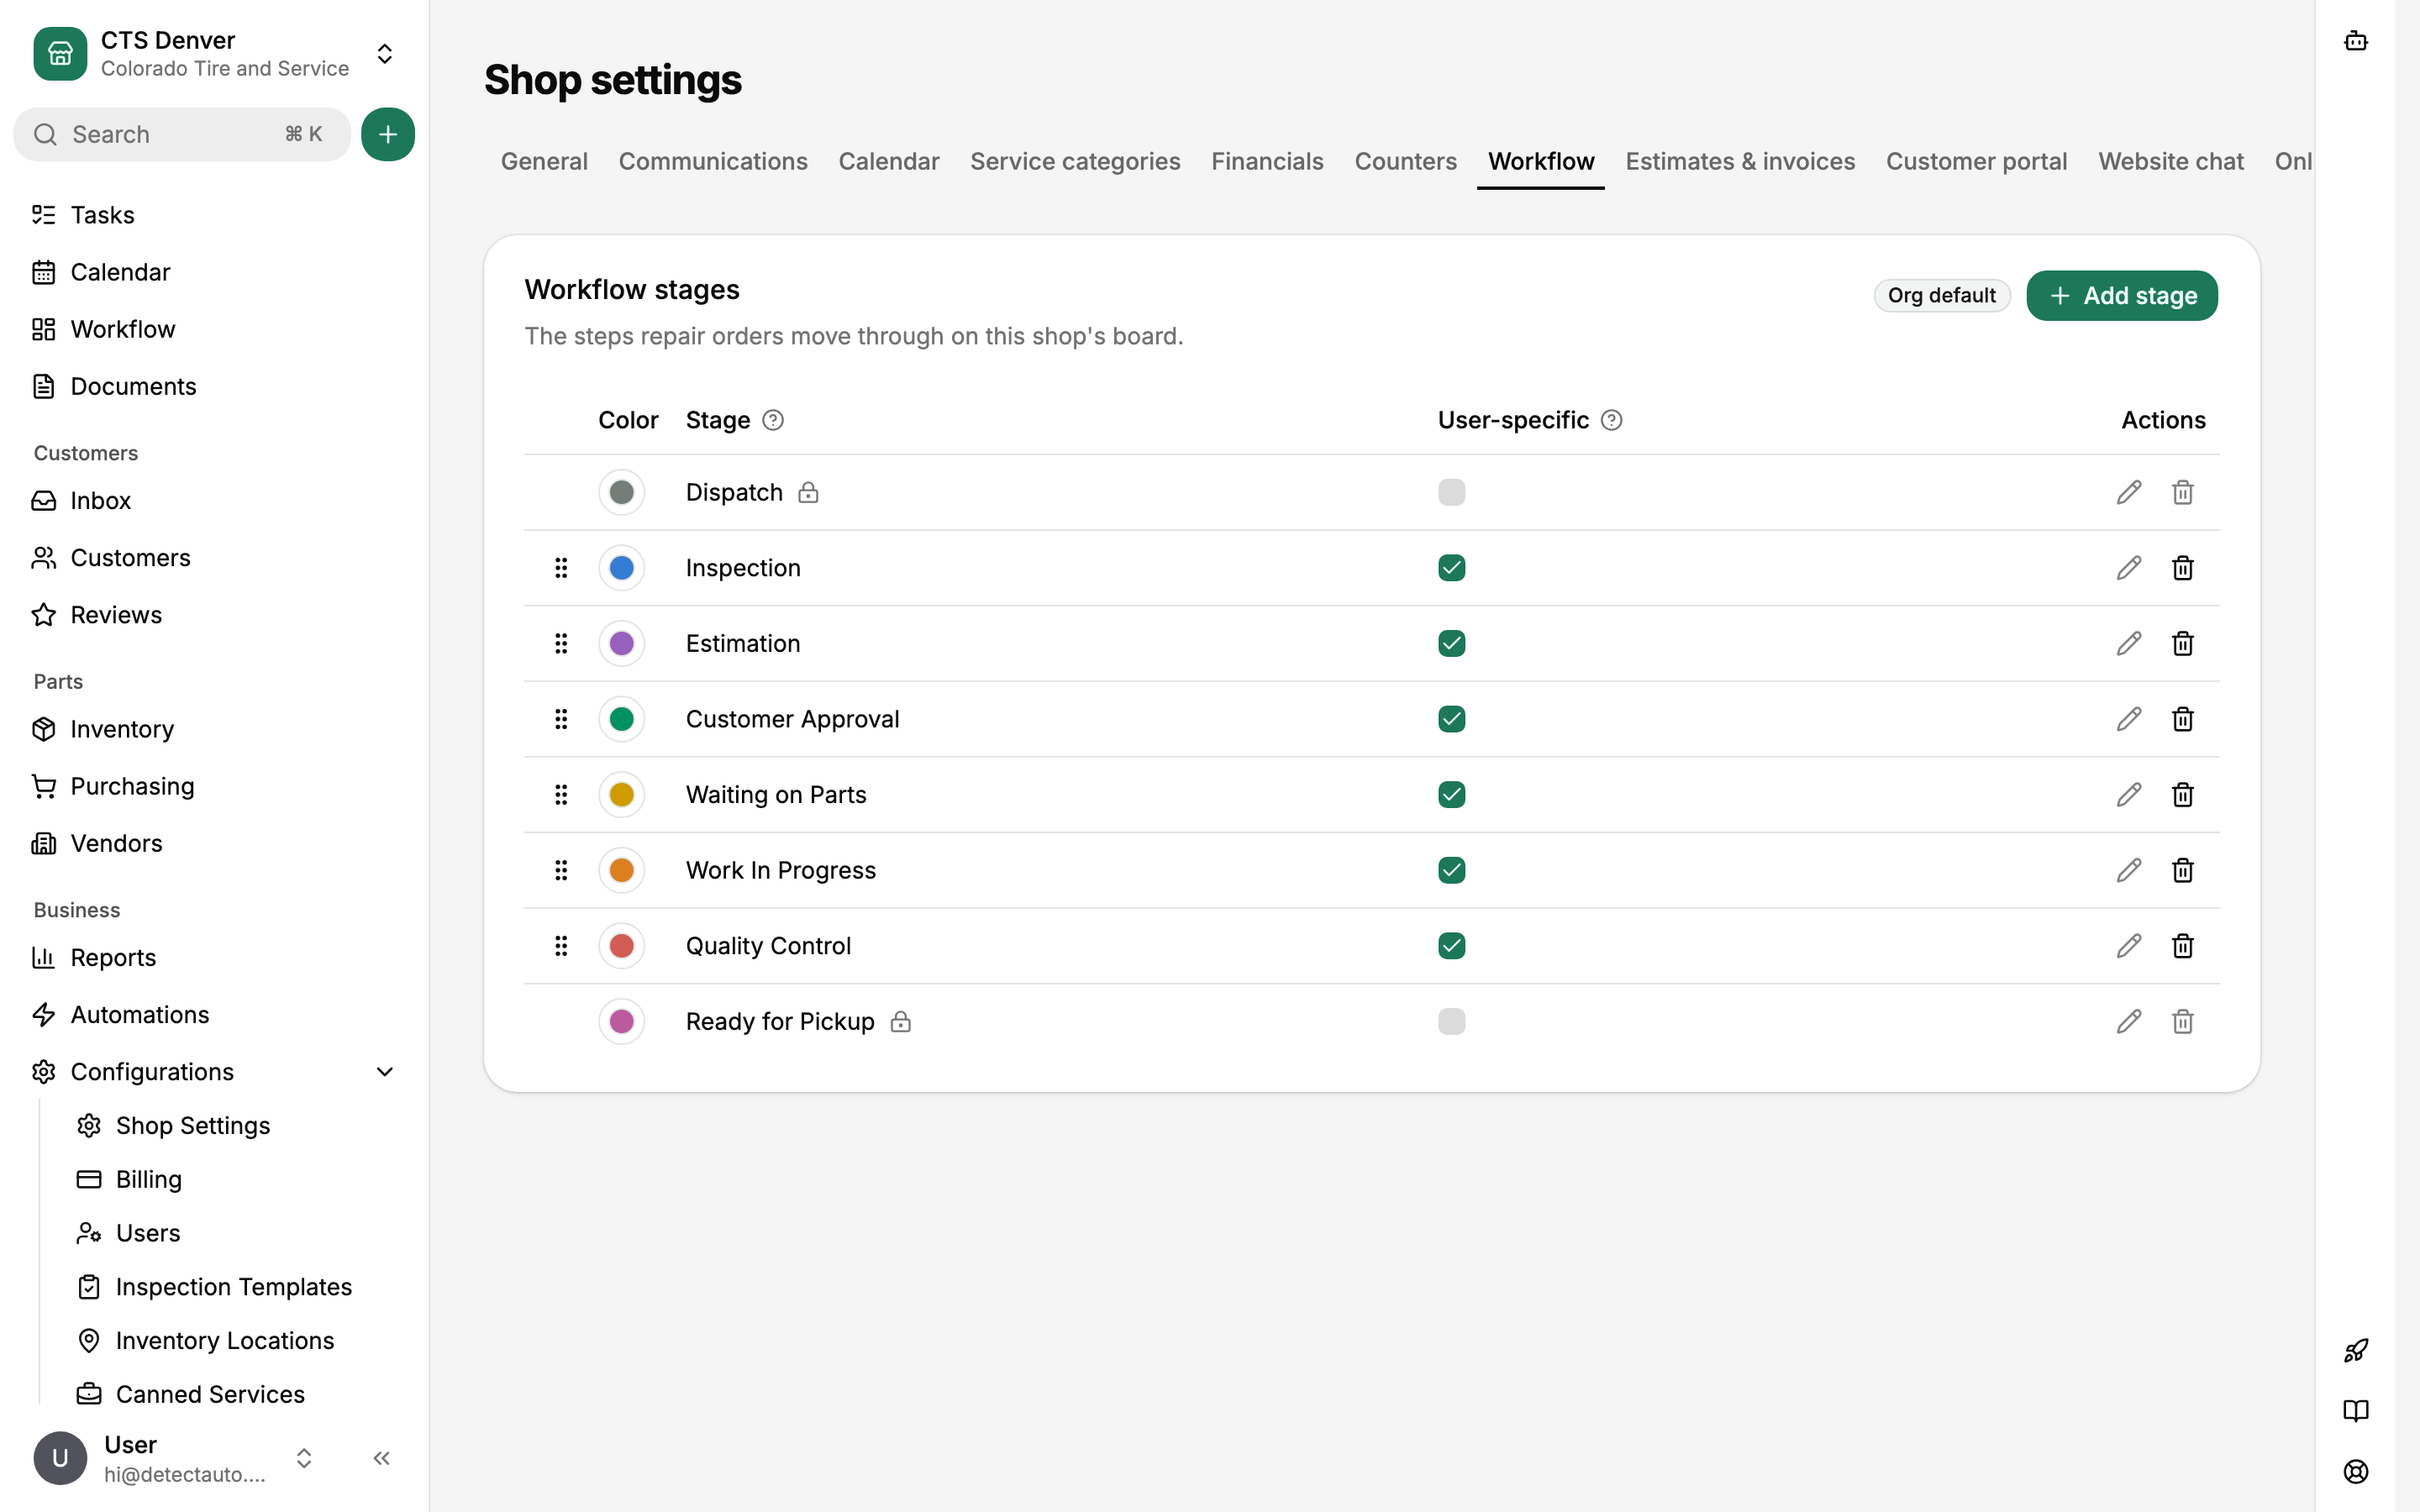
| Stage | Board layout |
|---|---|
| Dispatch | Full-width |
| Inspection | By user |
| Estimation | By user |
| Customer Approval | By user |
| Waiting on Parts | By user |
| Work In Progress | By user |
| Quality Control | By user |
| Ready for Pickup | Full-width |
Board layout is the User-specific setting, explained further down.
Two rules apply to this list. The first and last stages are locked: they cannot be removed or reordered, because they anchor the customer tracker's check-in and pickup steps. And the eight pre-built stages cannot be renamed, because product behavior is tied to their names (default resets and organization propagation match stages by name). If you want different words on the board, add a custom stage; custom stages can be renamed freely.
Add a stage
- Click Add stage.
- Enter a name, such as "Wash car" or "Call customer".
- Pick a color.
- Choose a board layout: By user or Full-width.
- Click Add stage.
The new stage lands immediately above the last stage. Drag it into place from there.
If you removed a stage earlier, the same dialog shows a Restore removed stage section. Restoring brings the stage back with its previous color and layout, also placed just above the last stage.
Recolor or rename a stage
Click the colored dot on a stage's row to pick a new color from the palette. The color marks the stage on the board and in the stage picker on each repair order page, so keep neighboring stages visually distinct.
To rename a custom stage, click the pencil icon on its row, edit the name, and click Save changes. The pencil is disabled on the eight pre-built stages.
Reorder stages
Drag a stage by the grip handle at the left of its row. Only the stages between the locked first and last stages can move, so the handles appear once the board has at least four active stages (two movable middle stages). Reordering changes column order on the board and nothing else; no repair order changes stage.
Remove a stage, and what happens to the repair orders in it
Click the trash icon on the stage's row. What happens next depends on whether the stage holds work:
- If the stage has no active repair orders, it is removed immediately.
- If it does, a Move repair orders first dialog opens. It shows how many active repair orders are in the stage and asks for a Move to stage. When you click Remove stage, every one of those repair orders moves to the stage you chose, and each move is recorded in the repair order's activity.
You cannot remove the first or last stage, and a stage cannot be removed by moving its repair orders into itself.
Removing a stage archives it rather than deleting it. Its name, color, and layout are kept, and it stays available under Restore removed stage in the Add stage dialog. Past stage moves on repair order histories keep the stage's name either way.
The user-specific setting
Each stage has a User-specific checkbox. When it is on, the stage shows a separate lane per technician on the board, plus an Unassigned lane for repair orders with no technician, based on the technician assigned to each repair order. When it is off, the stage is one full-width row shared by everyone.
The defaults follow a common pattern: the middle stages are per-user so you can see who owns what at a glance, while Dispatch and Ready for Pickup are full-width pools that no one person owns. Toggling the checkbox only changes how the board is drawn; no repair order changes stage or technician.
Organization default or shop override
If your organization has more than one shop, the stage list can either follow the organization default or be the shop's own. A badge on the Workflow stages card names the current source.
A shop that follows the organization default picks up any change made to the organization's board. The first edit a shop makes to its own tab turns the list into a shop override, and organization changes stop flowing to it. Reset to organization default undoes that: the shop's customizations are replaced by the organization board and stay in sync again. During any reset, repair orders stay in stages whose names match; repair orders in a stage that no longer exists move to the first stage.
The organization's own Workflow settings page, reached through Org view, edits the default board for every shop that still inherits it and has a Reset defaults button that restores the stock eight stages. See Organization defaults and shop overrides for how settings sources work across the product.
Where the other operational defaults live
The Workflow tab holds only the stage list. The other defaults that shape daily operations sit on these configuration tabs:
- Business hours and the default appointment duration are on the General > Hours and calendar, covered in Shop identity, contact information, hours, and closures.
- Part markup, labor rates, fees, discounts, and tax are all under Financial, covered in Labor rates, part markup, fees, discounts, and taxes.
- Payment methods and estimate and invoice presentation are covered in Payment methods and customer-document settings.
- Starting numbers for estimate, repair order, counter sale, and purchase order sequences are under Operations > Customer documents; set them before your first repair order, as described in New-shop onboarding.