New-shop onboarding
This guide takes a brand-new shop from first sign-in to its first repair order. The full pass takes an hour or two, plus whatever time it takes to dig up your tax rates and pricing policy.
You are not starting from zero. Every new shop is created with working defaults: a workflow board, a standard labor rate, a part markup table, a draft tax config, a default inventory location, and a starter set of automations. Onboarding is a pass through those defaults to replace them with your real numbers.
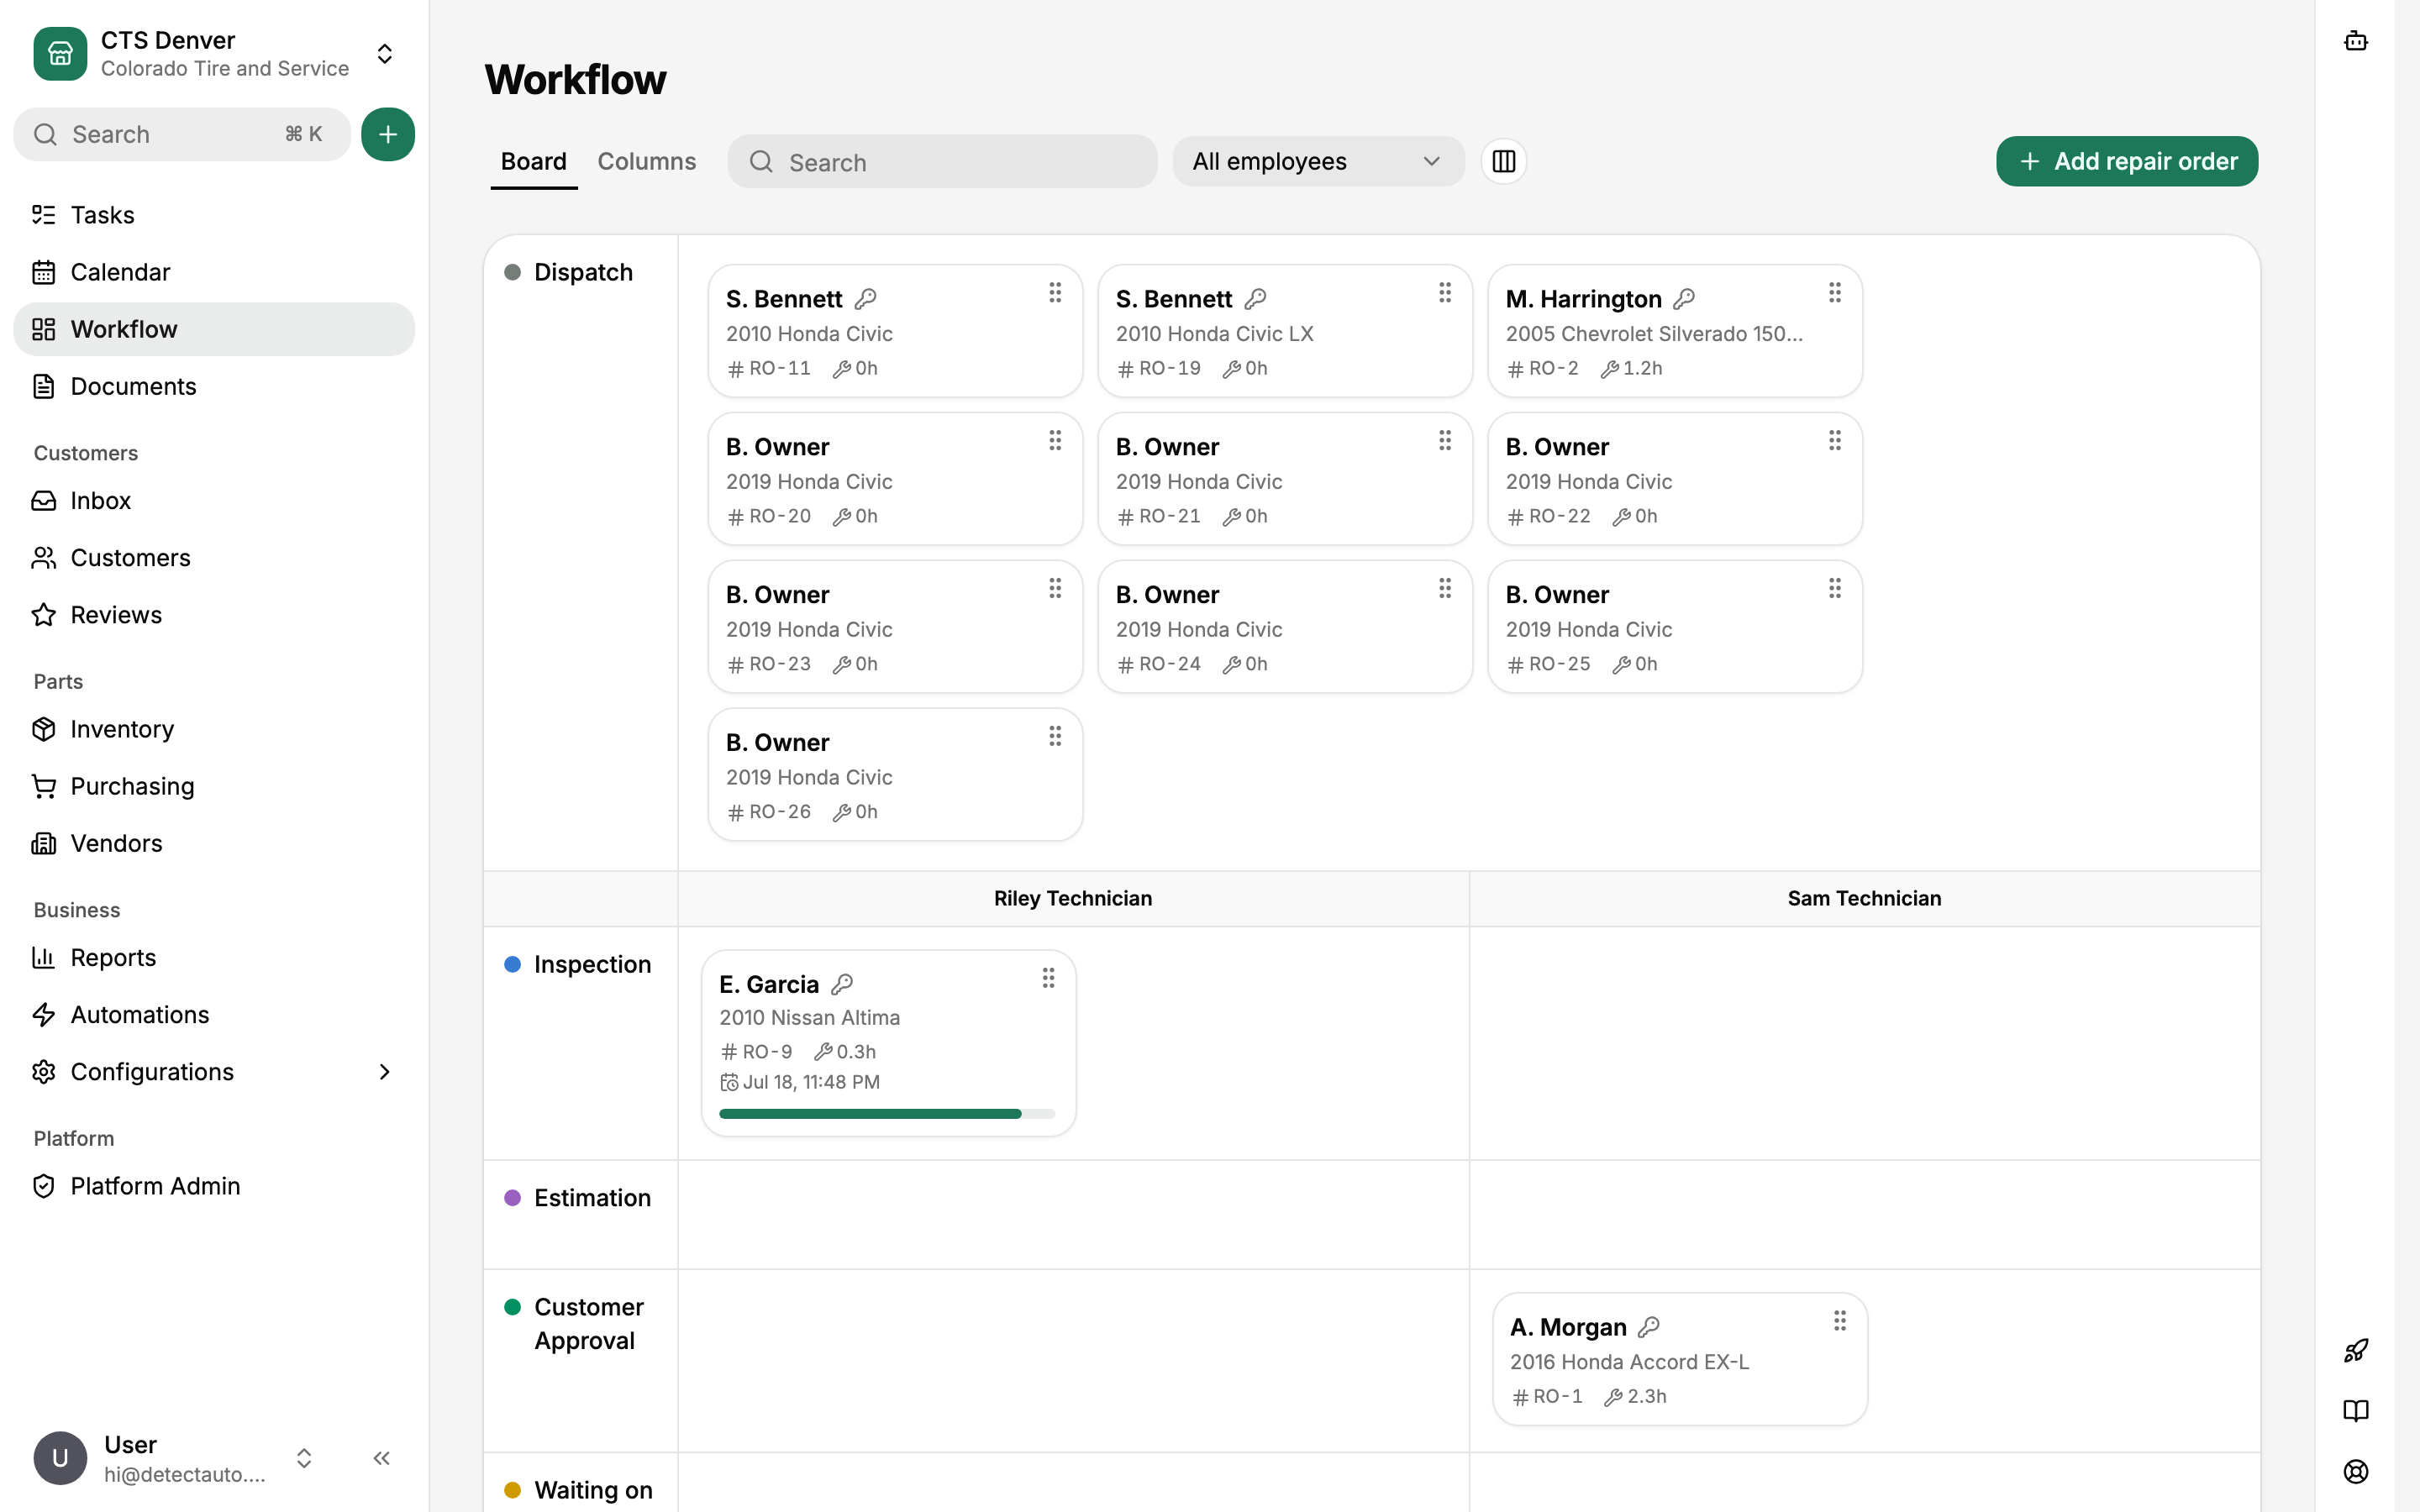
When you first sign in you land on the Workflow board. It stays empty until you write your first repair order. Configuration is grouped into five sidebar pages: General, Customer Experience, Operations, Parts, and Financial.
Work through the sections in order. Later steps lean on earlier ones: you can't collect a payment with no payment methods, and you can't send an estimate before your tax rates are confirmed.
Have this ready
Setup goes faster with these on hand:
- Legal business name, shop address, phone, email, and website
- Your repair-facility license number, if your state issues one
- Sales tax rates for labor, parts, and fees
- Labor rates in dollars per hour, and your parts markup policy
- Standard fees (shop supplies, disposal) and any standing discounts
- An email address for each staff member you'll invite
Confirm your shop identity
Open Configurations > General > Business info. It holds identity, contact, address, and locale.
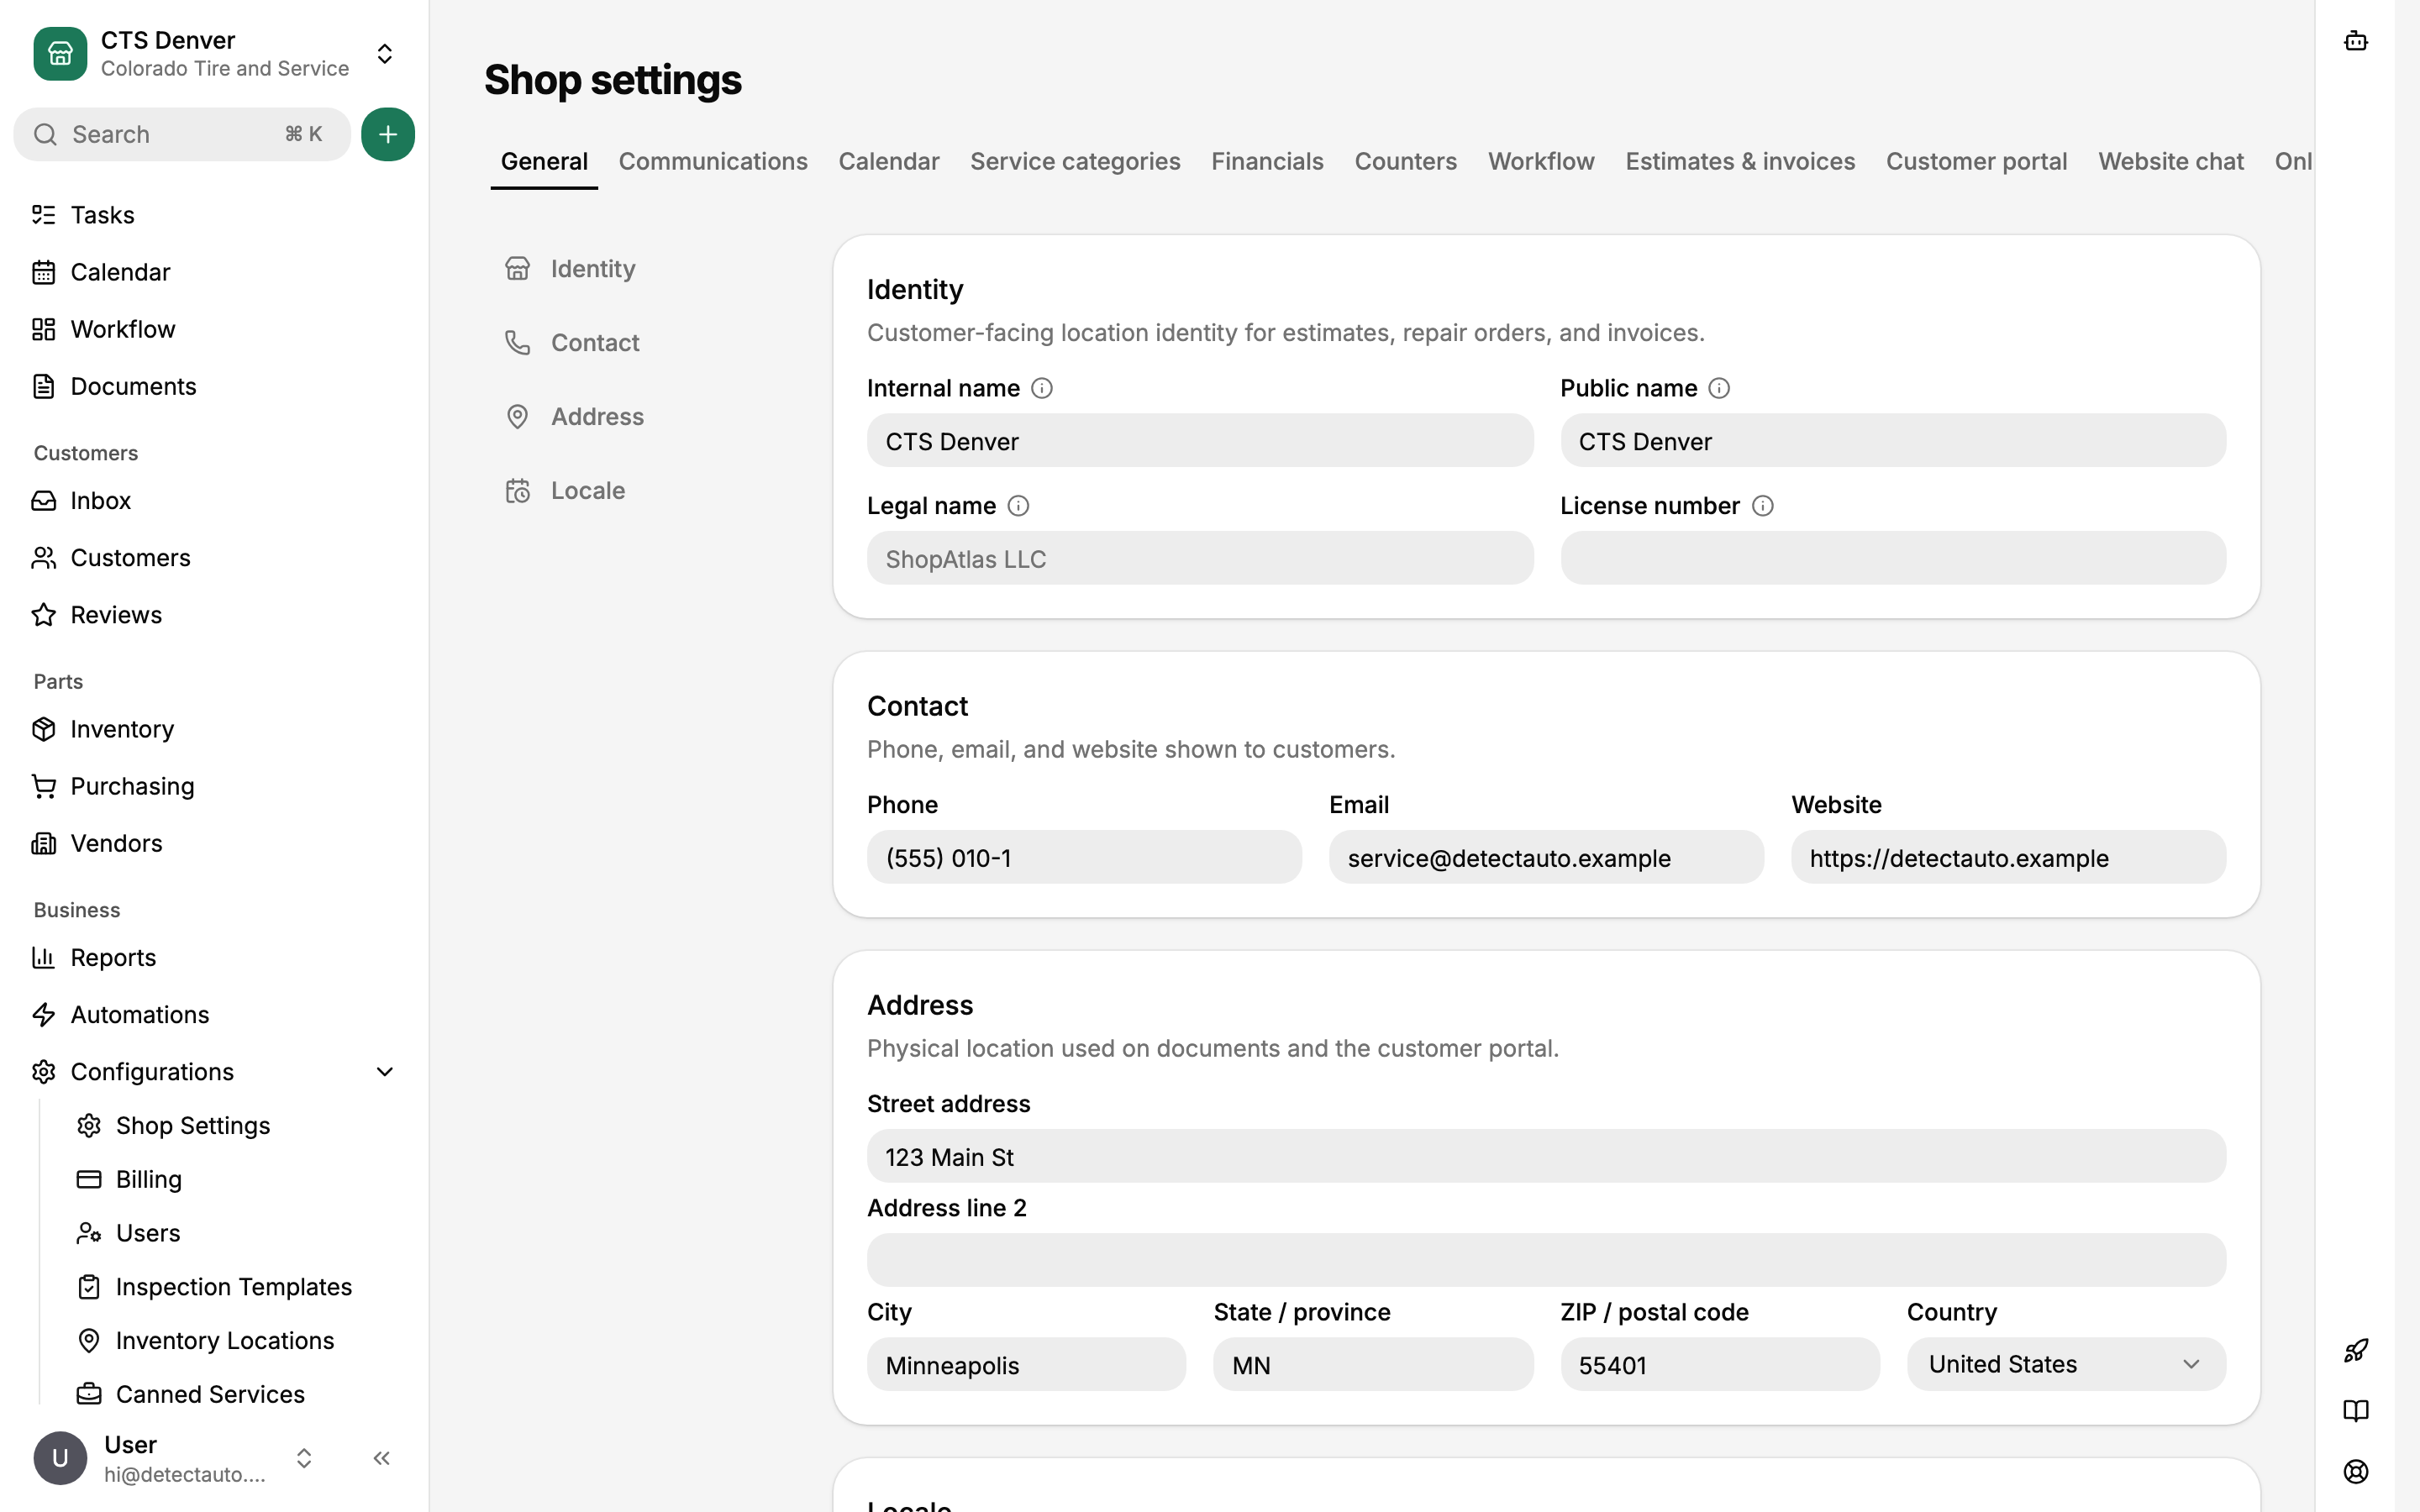
A shop has two names. The Internal name is what your staff sees in the shop switcher, and shorthand is fine there ("CTS Denver"). The Public name is what customers see on estimates, invoices, and the customer portal. Both are required. When the shop was created, the Public name was copied from the Internal name, so check that it reads the way a customer should see it. Fill in Legal name and License number if your documents need them.
Then work down the page:
- Contact is the phone, email, and website shown to customers on documents.
- Address is the physical location printed on documents and the portal.
- Locale sets your timezone and distance unit. The timezone drives every time shown in the app, so set it before you book anything.
Set business hours and appointment defaults
The Hours and calendar tab under Configurations > General holds appointment settings and business hours. A new shop has no hours yet, so every day shows Closed.
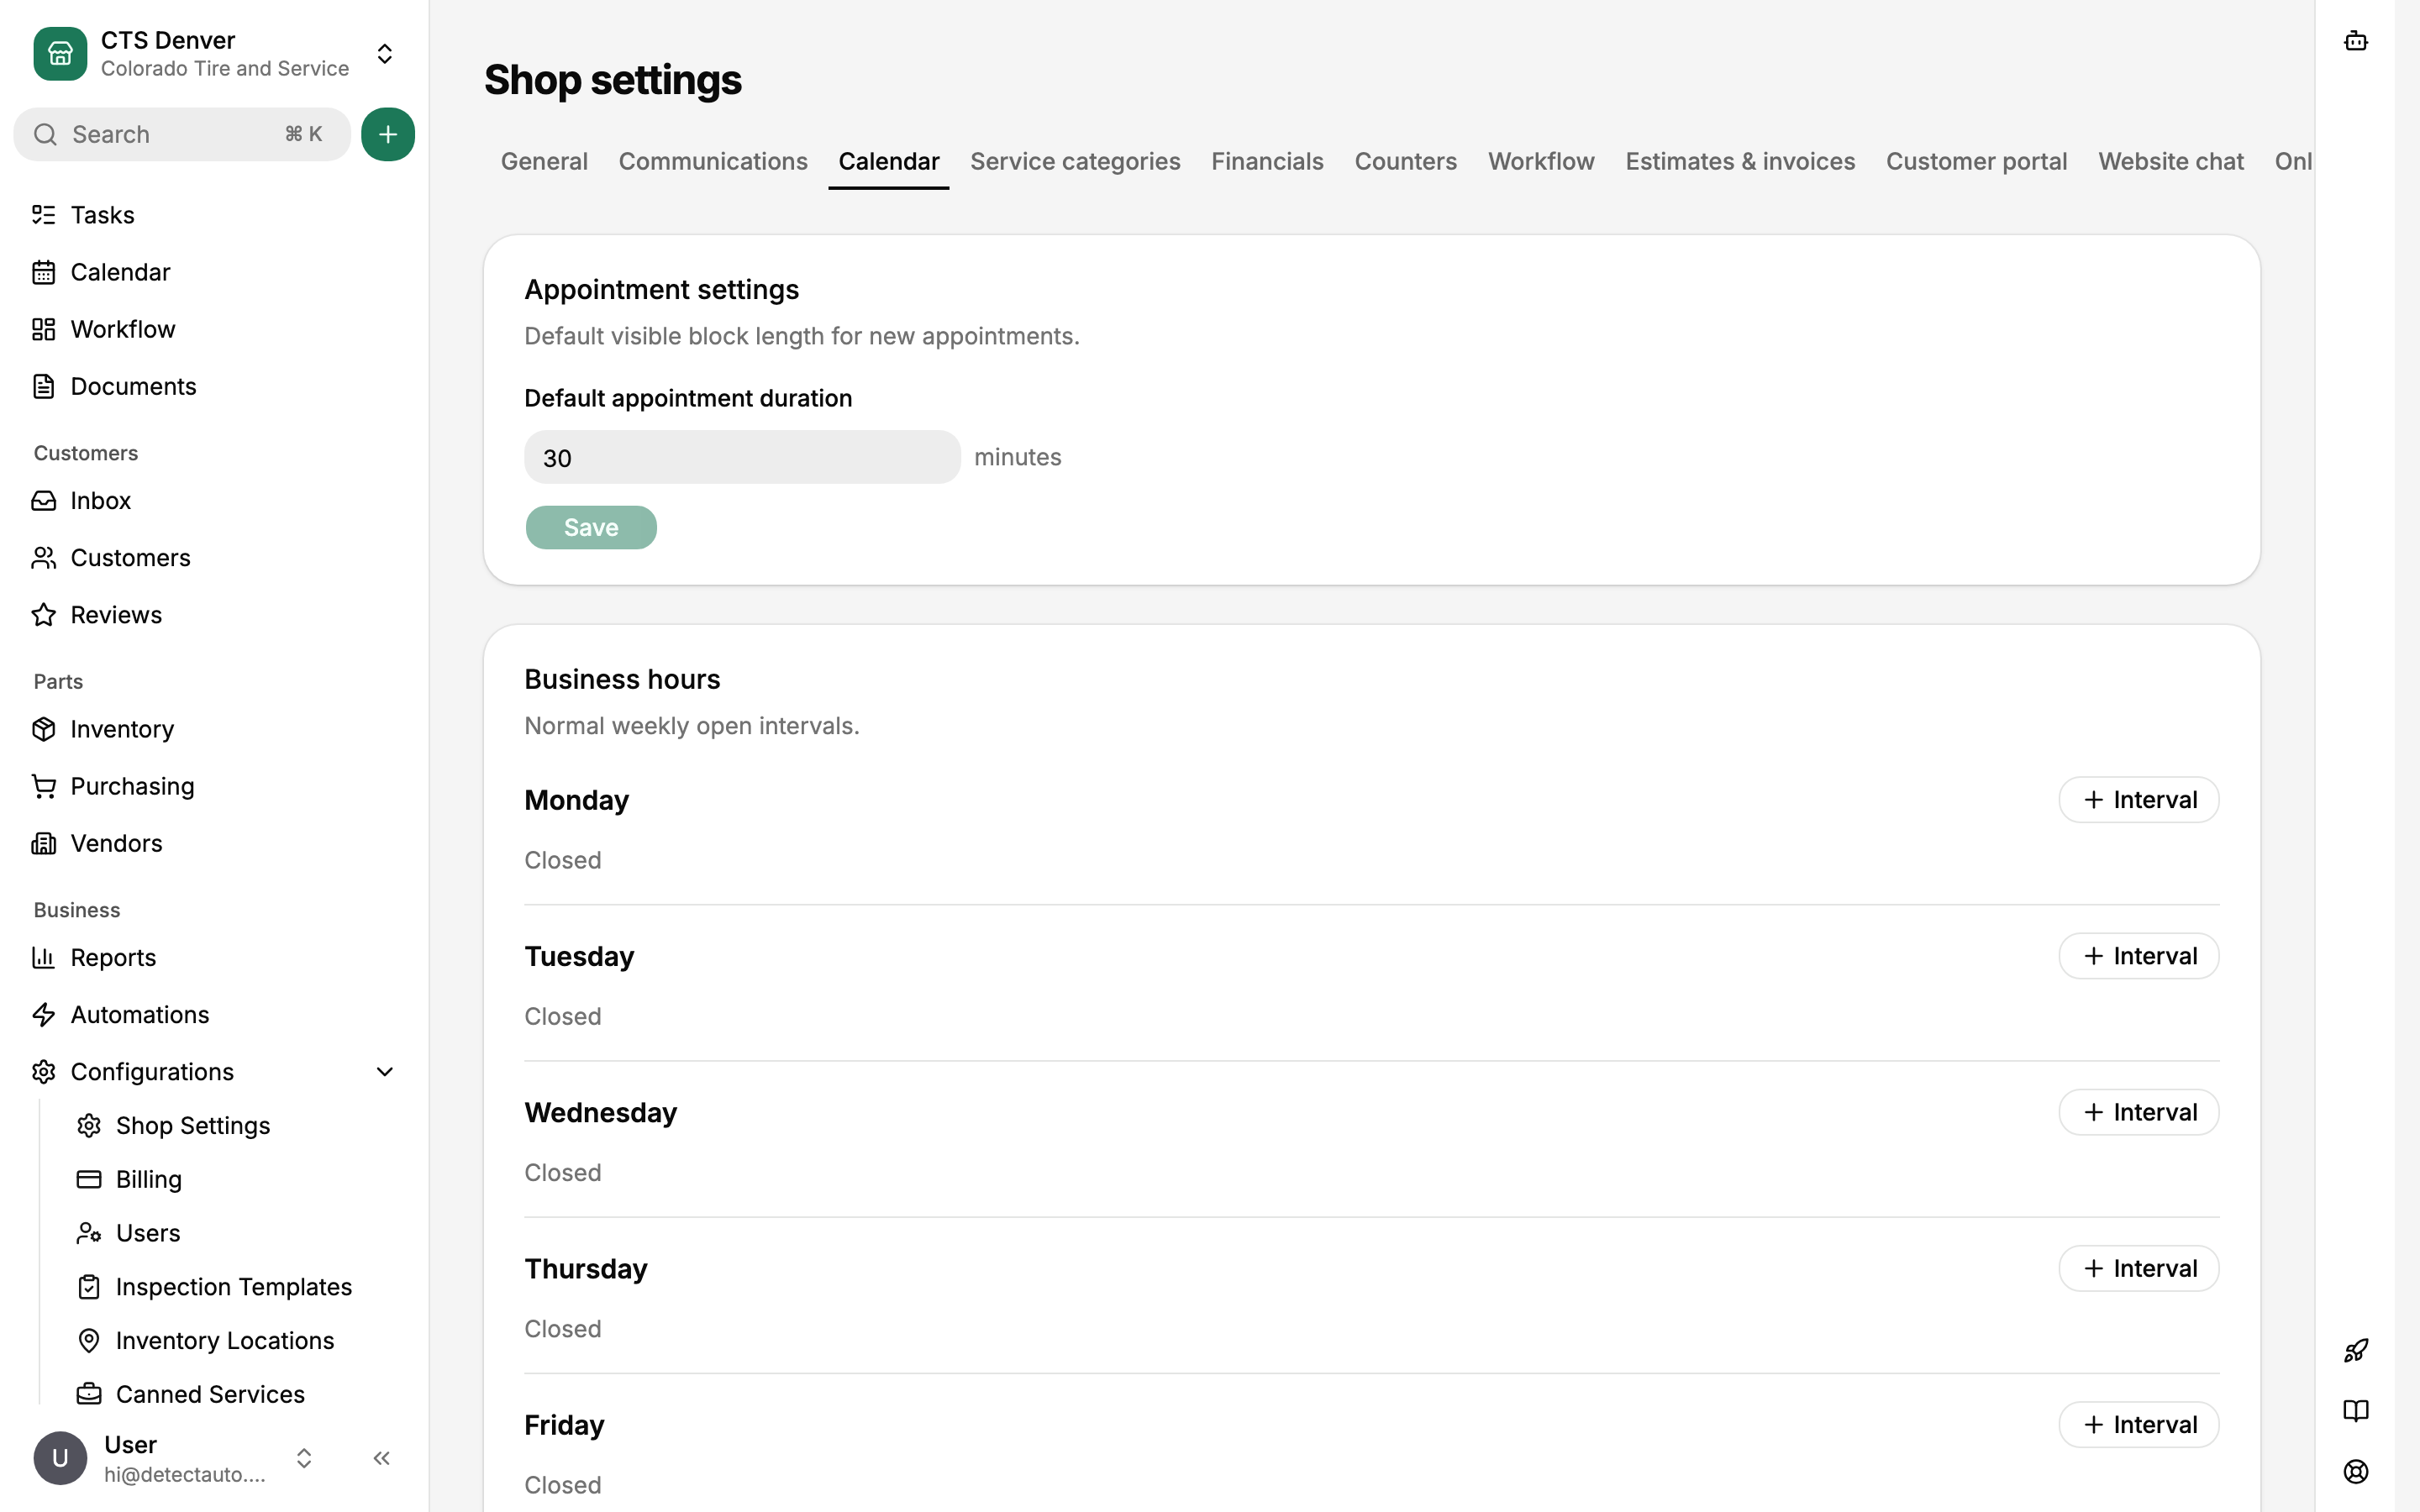
- For each day you're open, turn on its switch and enter the opening and closing times. Use the small + button to add a second interval if you close midday, or copy one day's schedule to other days.
- Set the Default appointment duration. This is the block length new appointments get on the calendar before anyone adjusts them; 30 or 60 minutes suits most shops.
Holidays and one-off closures are not an hours setting. Create them on the Calendar page as shop closure events when they come up.
Set your pricing, fees, taxes, and payment methods
Open Configurations > Financial for labor rates, part markup, fees and discounts, taxes, and payment methods.
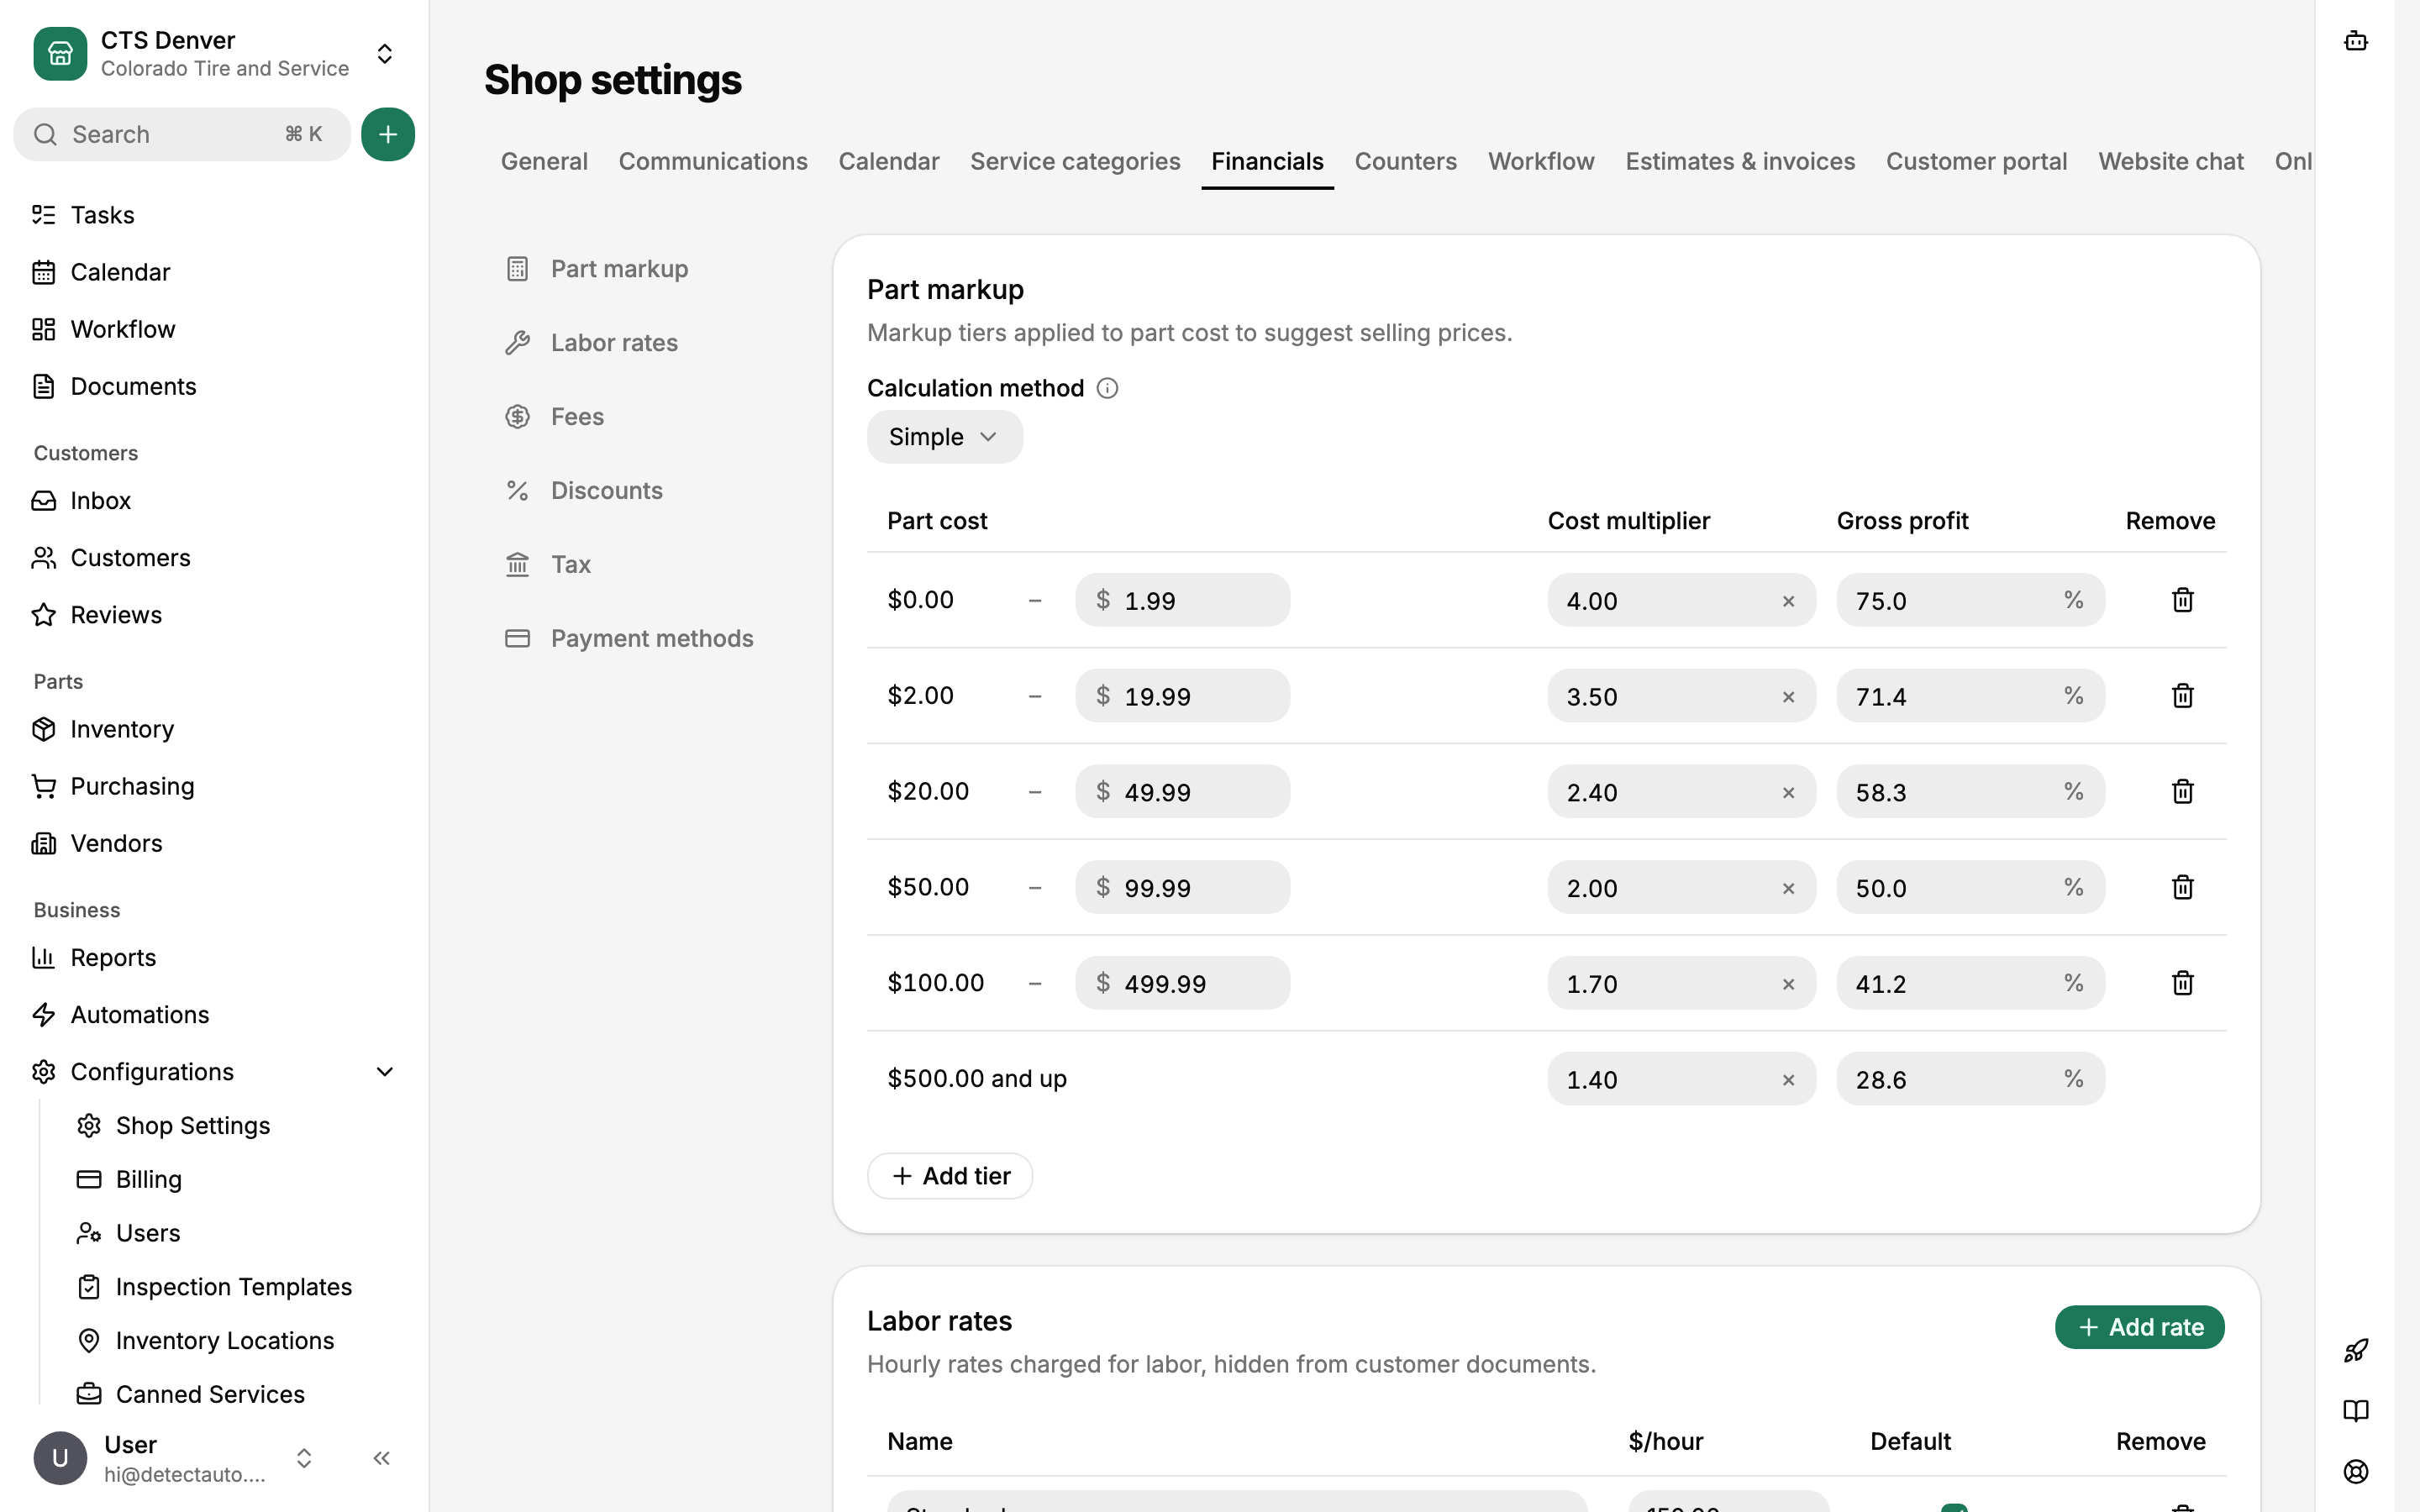
Part markup suggests a selling price whenever a part is added to an estimate. Each tier is a part-cost range with a cost multiplier and the gross profit percent it produces. The seeded table is a common curve (cheap parts marked up hard, expensive parts marked up gently). Adjust the tiers to your policy rather than rebuilding them.
Labor rates are named hourly rates: Standard, Diagnostic, Fleet, whatever you charge. Mark one as the default. Rates are hidden from customer documents; customers see line totals, not dollars per hour.
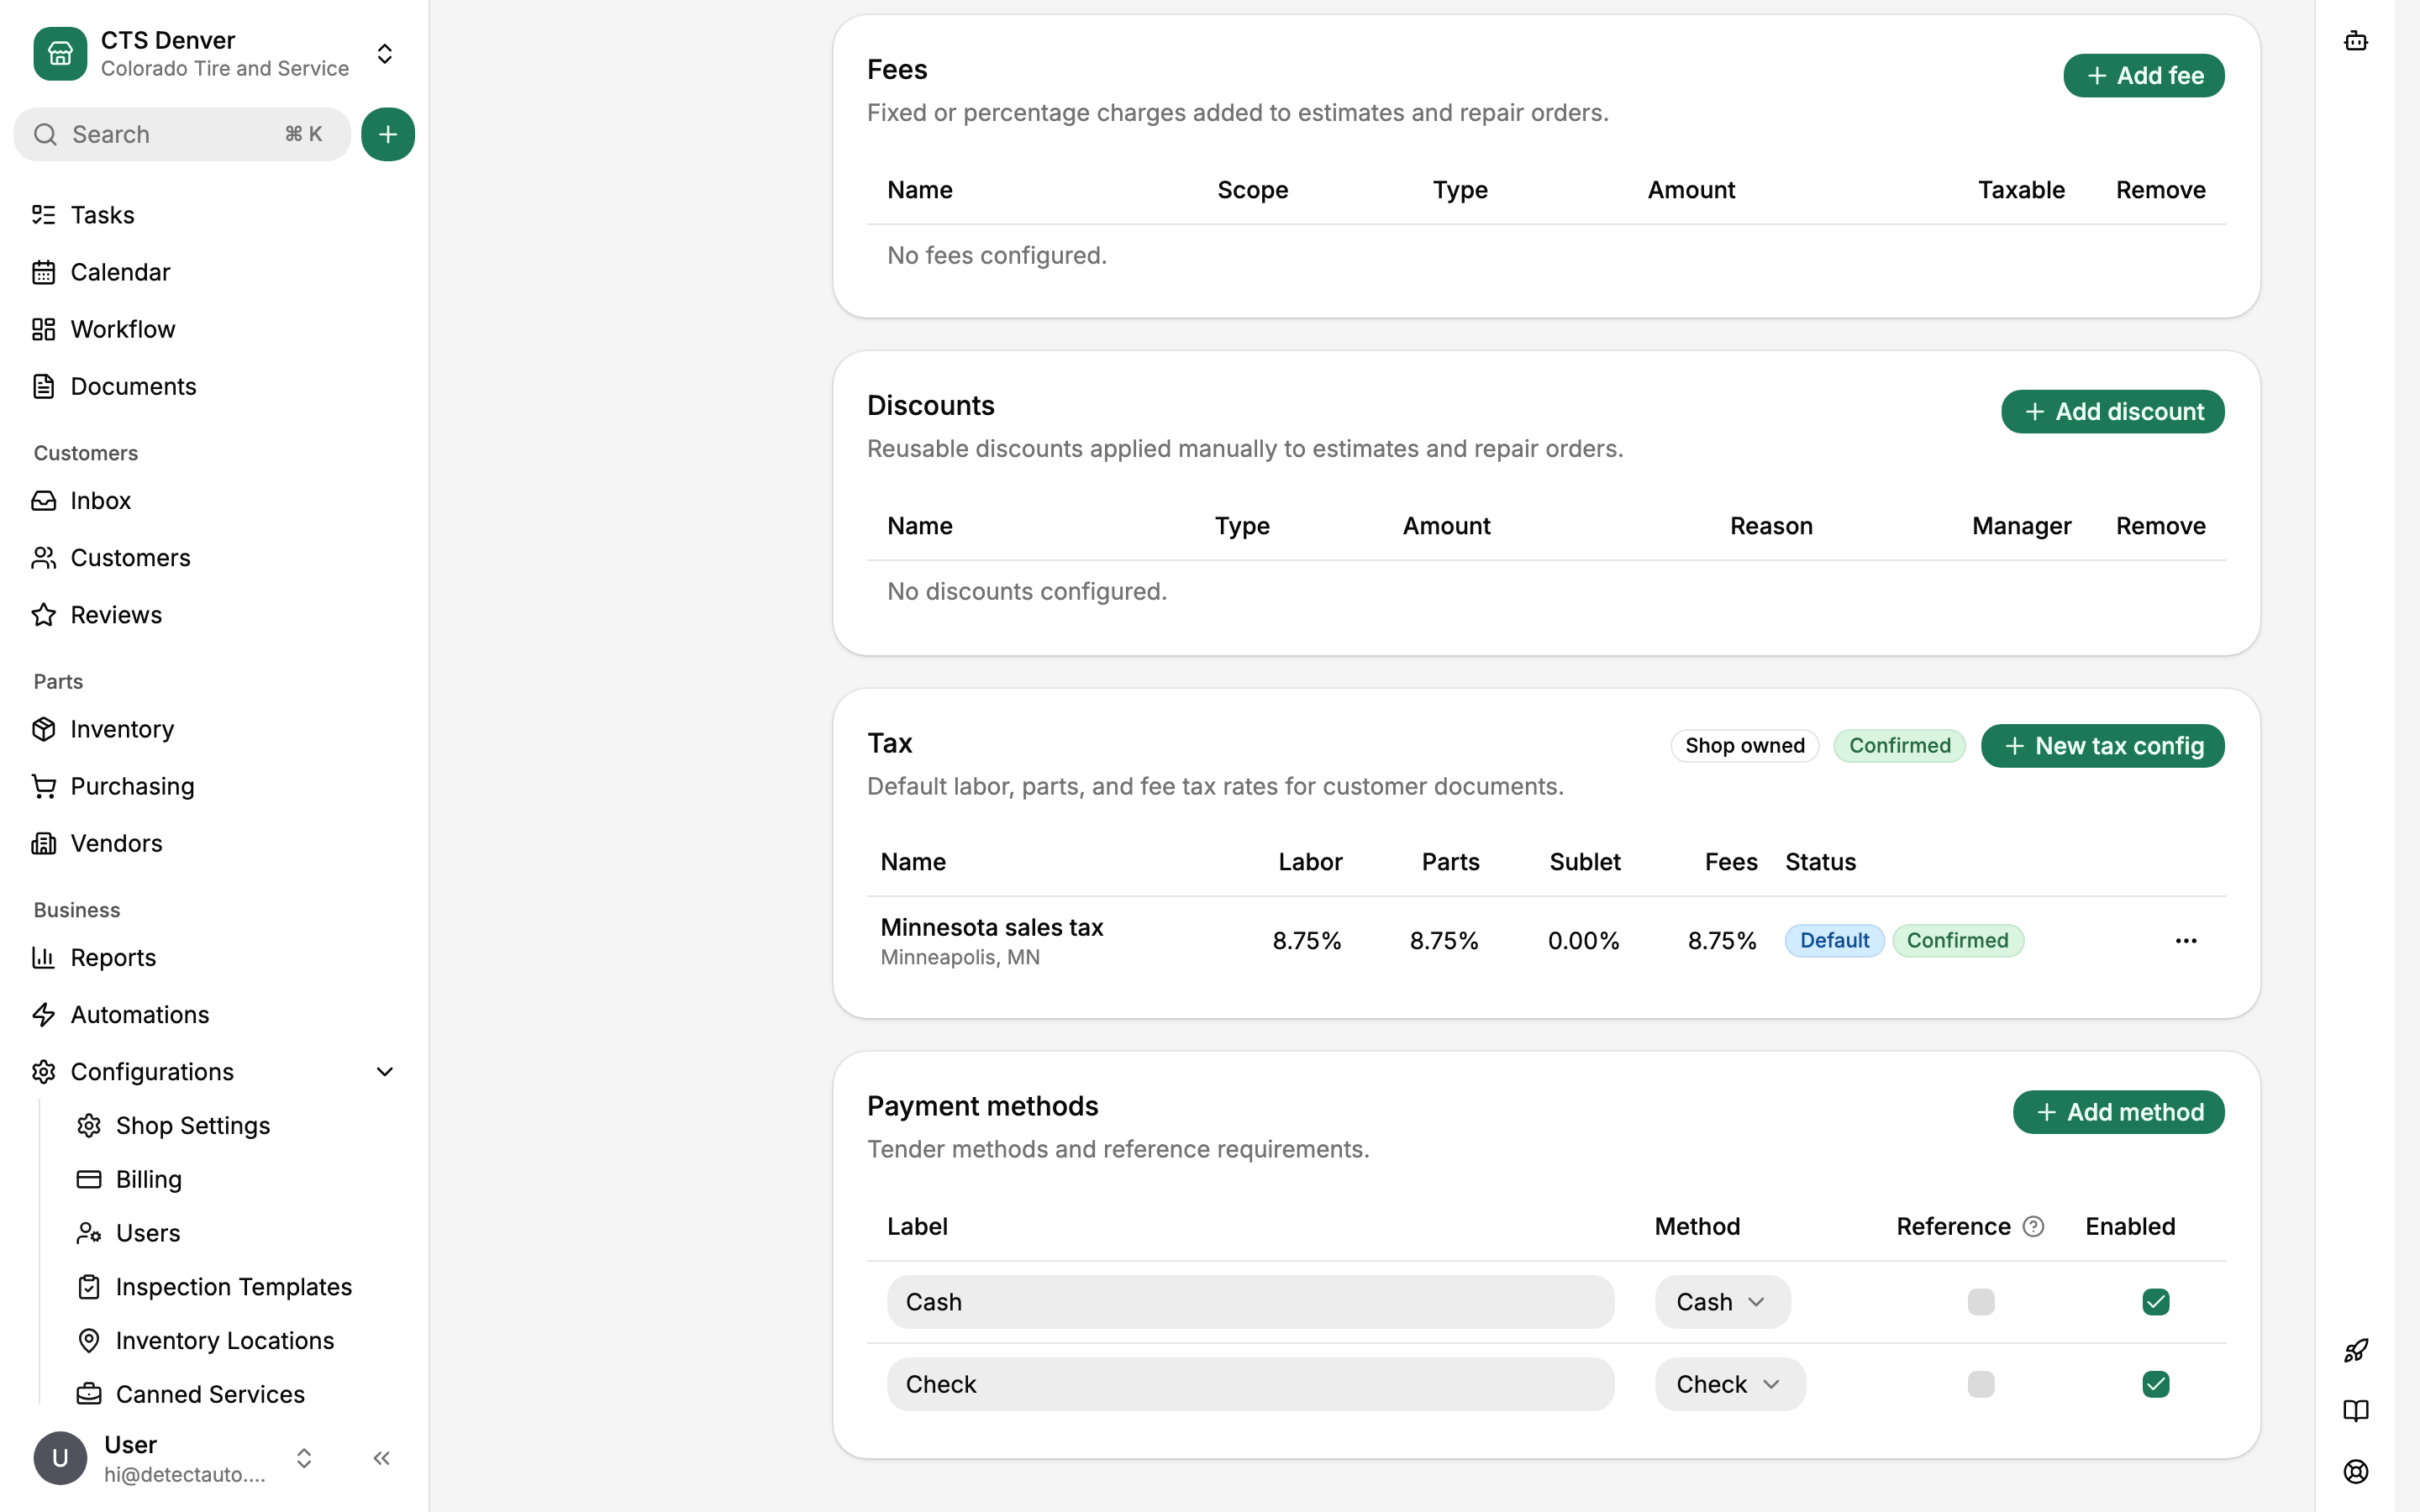
Fees are fixed or percentage charges added to estimates and repair orders, such as shop supplies or tire disposal, and each can be marked taxable. Discounts are reusable templates applied by hand, each with a reason and an optional manager-approval requirement. A new shop has none of either; add the ones you actually use.
Tax is the one section you cannot skip. The shop starts with a draft tax config, and a draft blocks sending estimates and invoices. Enter your default rates for labor, parts, sublets, and fees, then confirm the config. The Confirmed badge on the Tax card tells you it's done.
Payment methods lists the tenders your shop accepts. Enable the ones you take, and turn on Reference for methods where staff should record a number with the payment, like a check number.
While you're on numbers: Configurations > Operations > Estimates and invoices sets the starting number for estimate, repair order, counter sale, and purchase order sequences. If you're switching from another system and want RO numbers to pick up where the old ones left off, set that before writing your first repair order.
Review your workflow stages
Configurations > Operations > Workflow defines the stages repair orders move through on the board. New shops inherit the organization's default board: Dispatch, Inspection, Estimation, Customer Approval, Waiting on Parts, Work In Progress, Quality Control, Ready for Pickup.
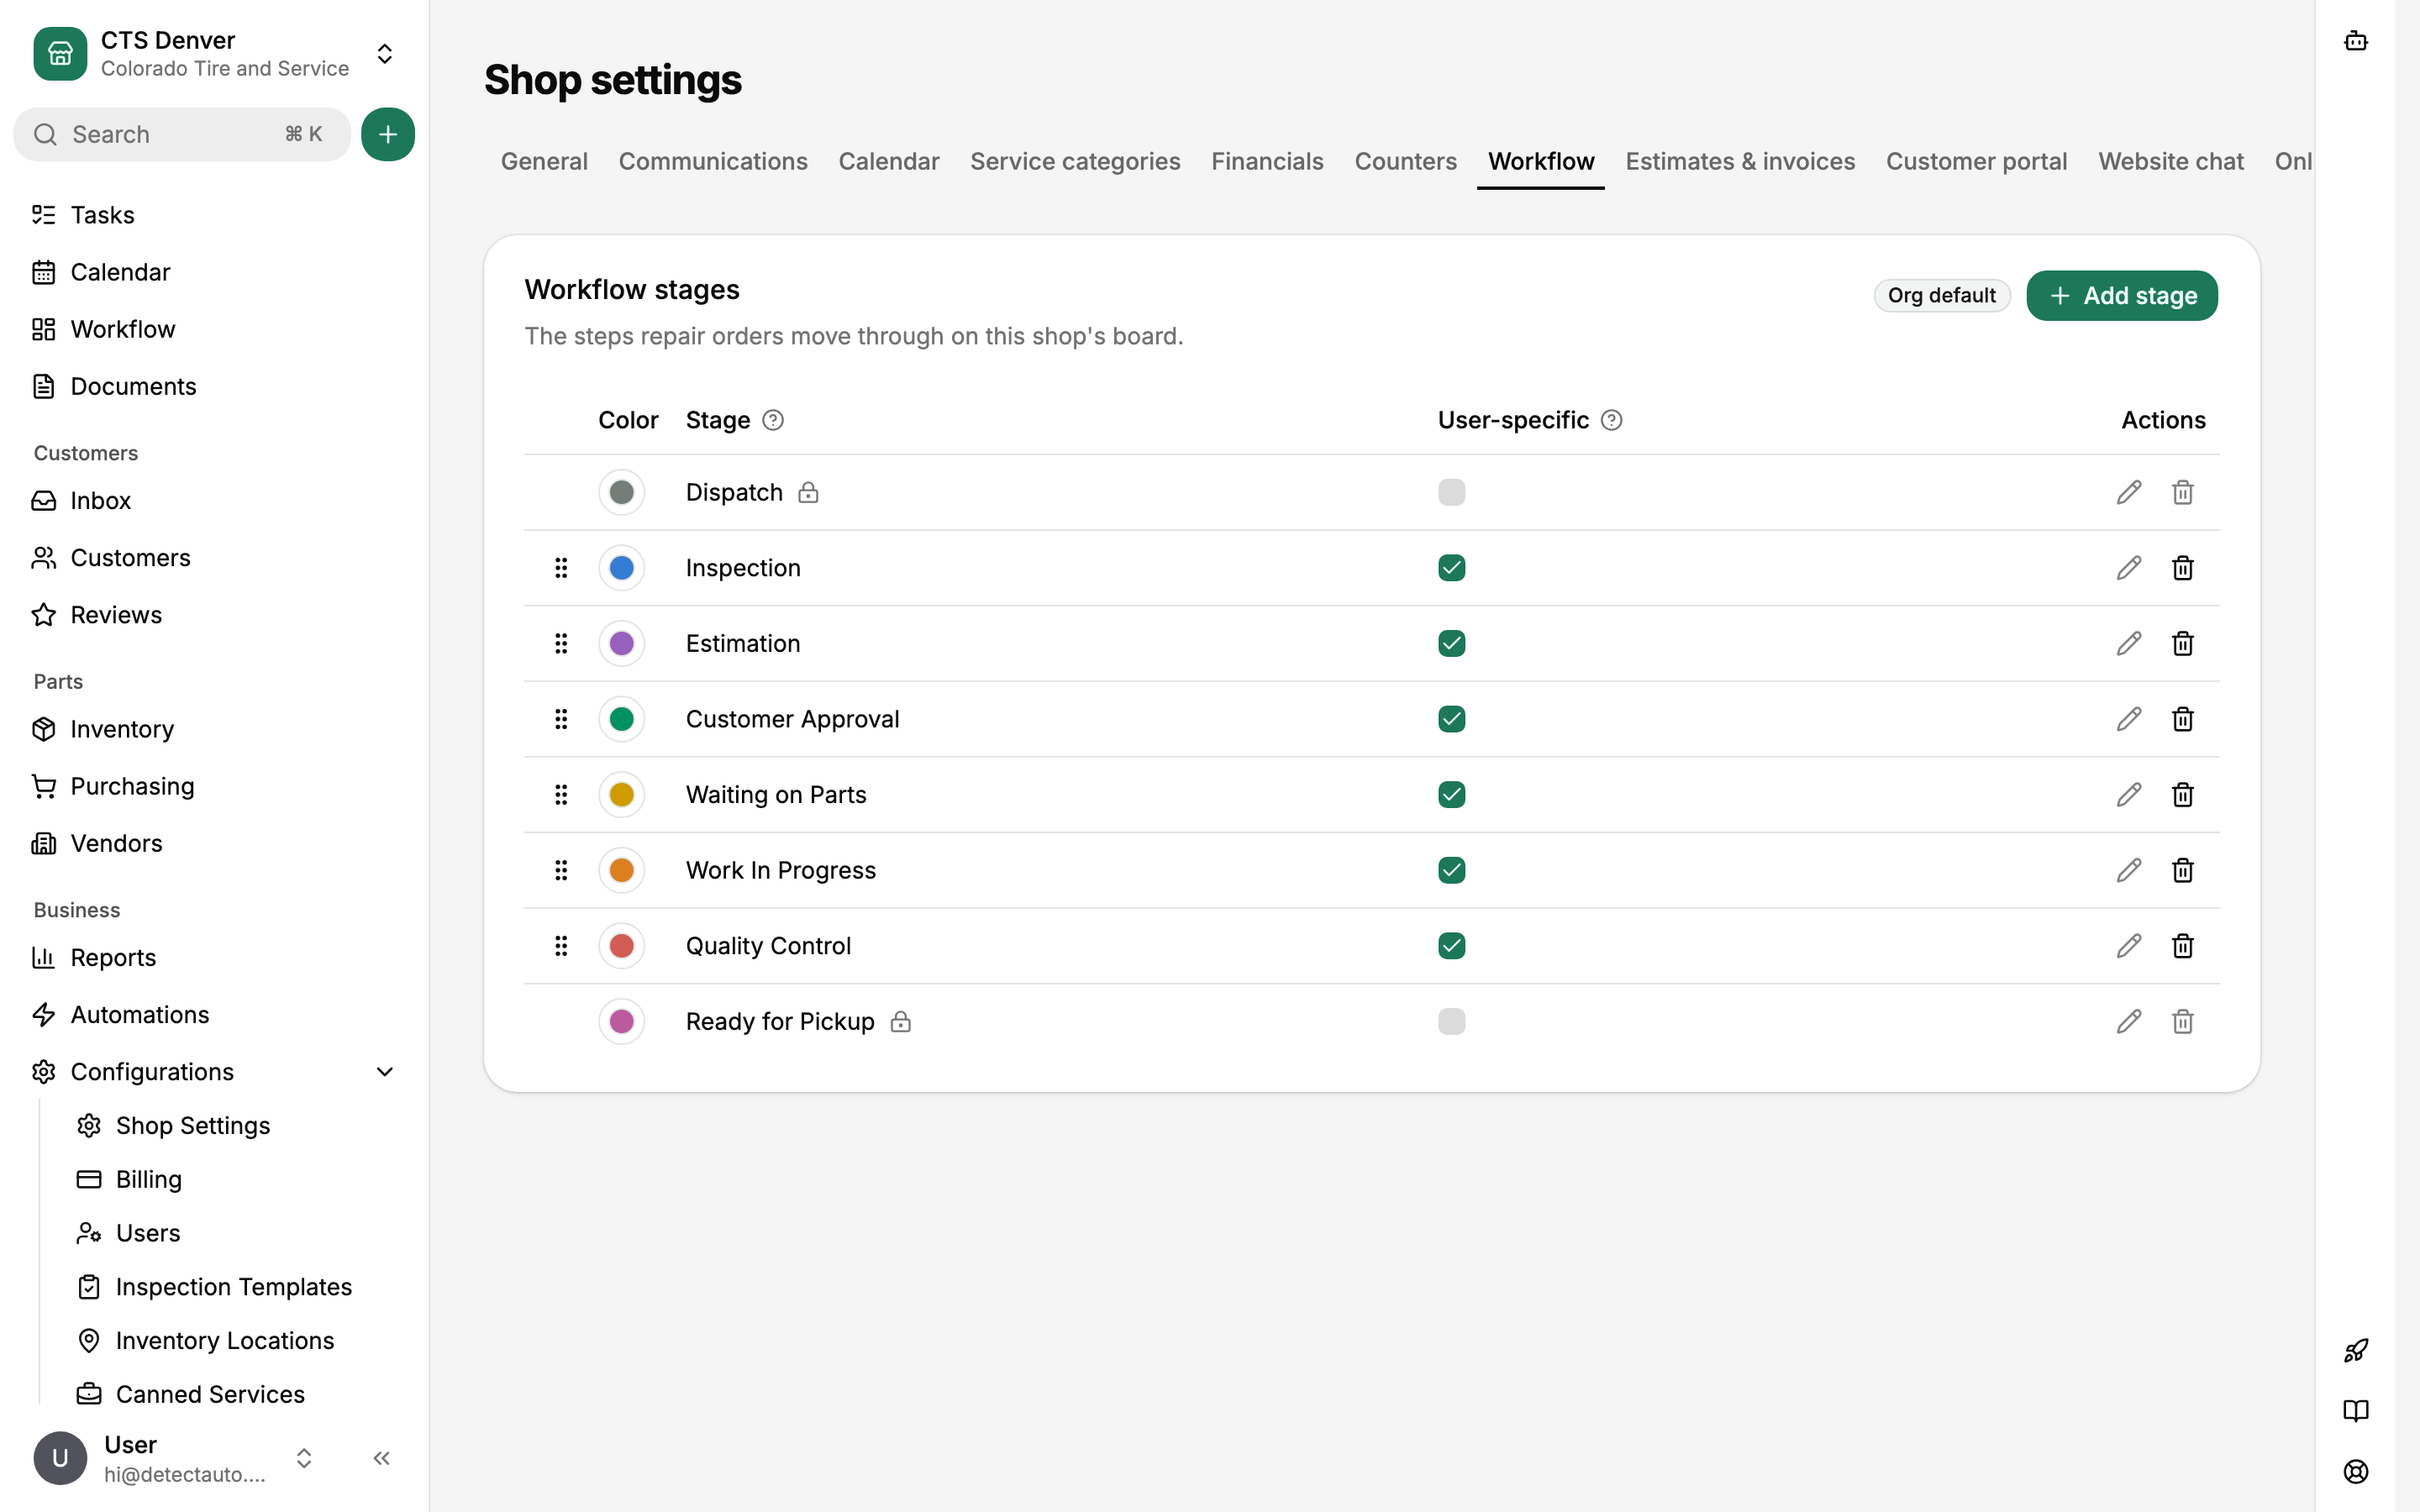
Rename, recolor, reorder, add, or remove stages to match how your shop talks about work. The first and last stages are locked in place. Stages marked User-specific get a column per technician on the board, which is how you see who owns what at a glance.
Invite your team
Open Configurations > General > Users and click Invite user for each staff member.
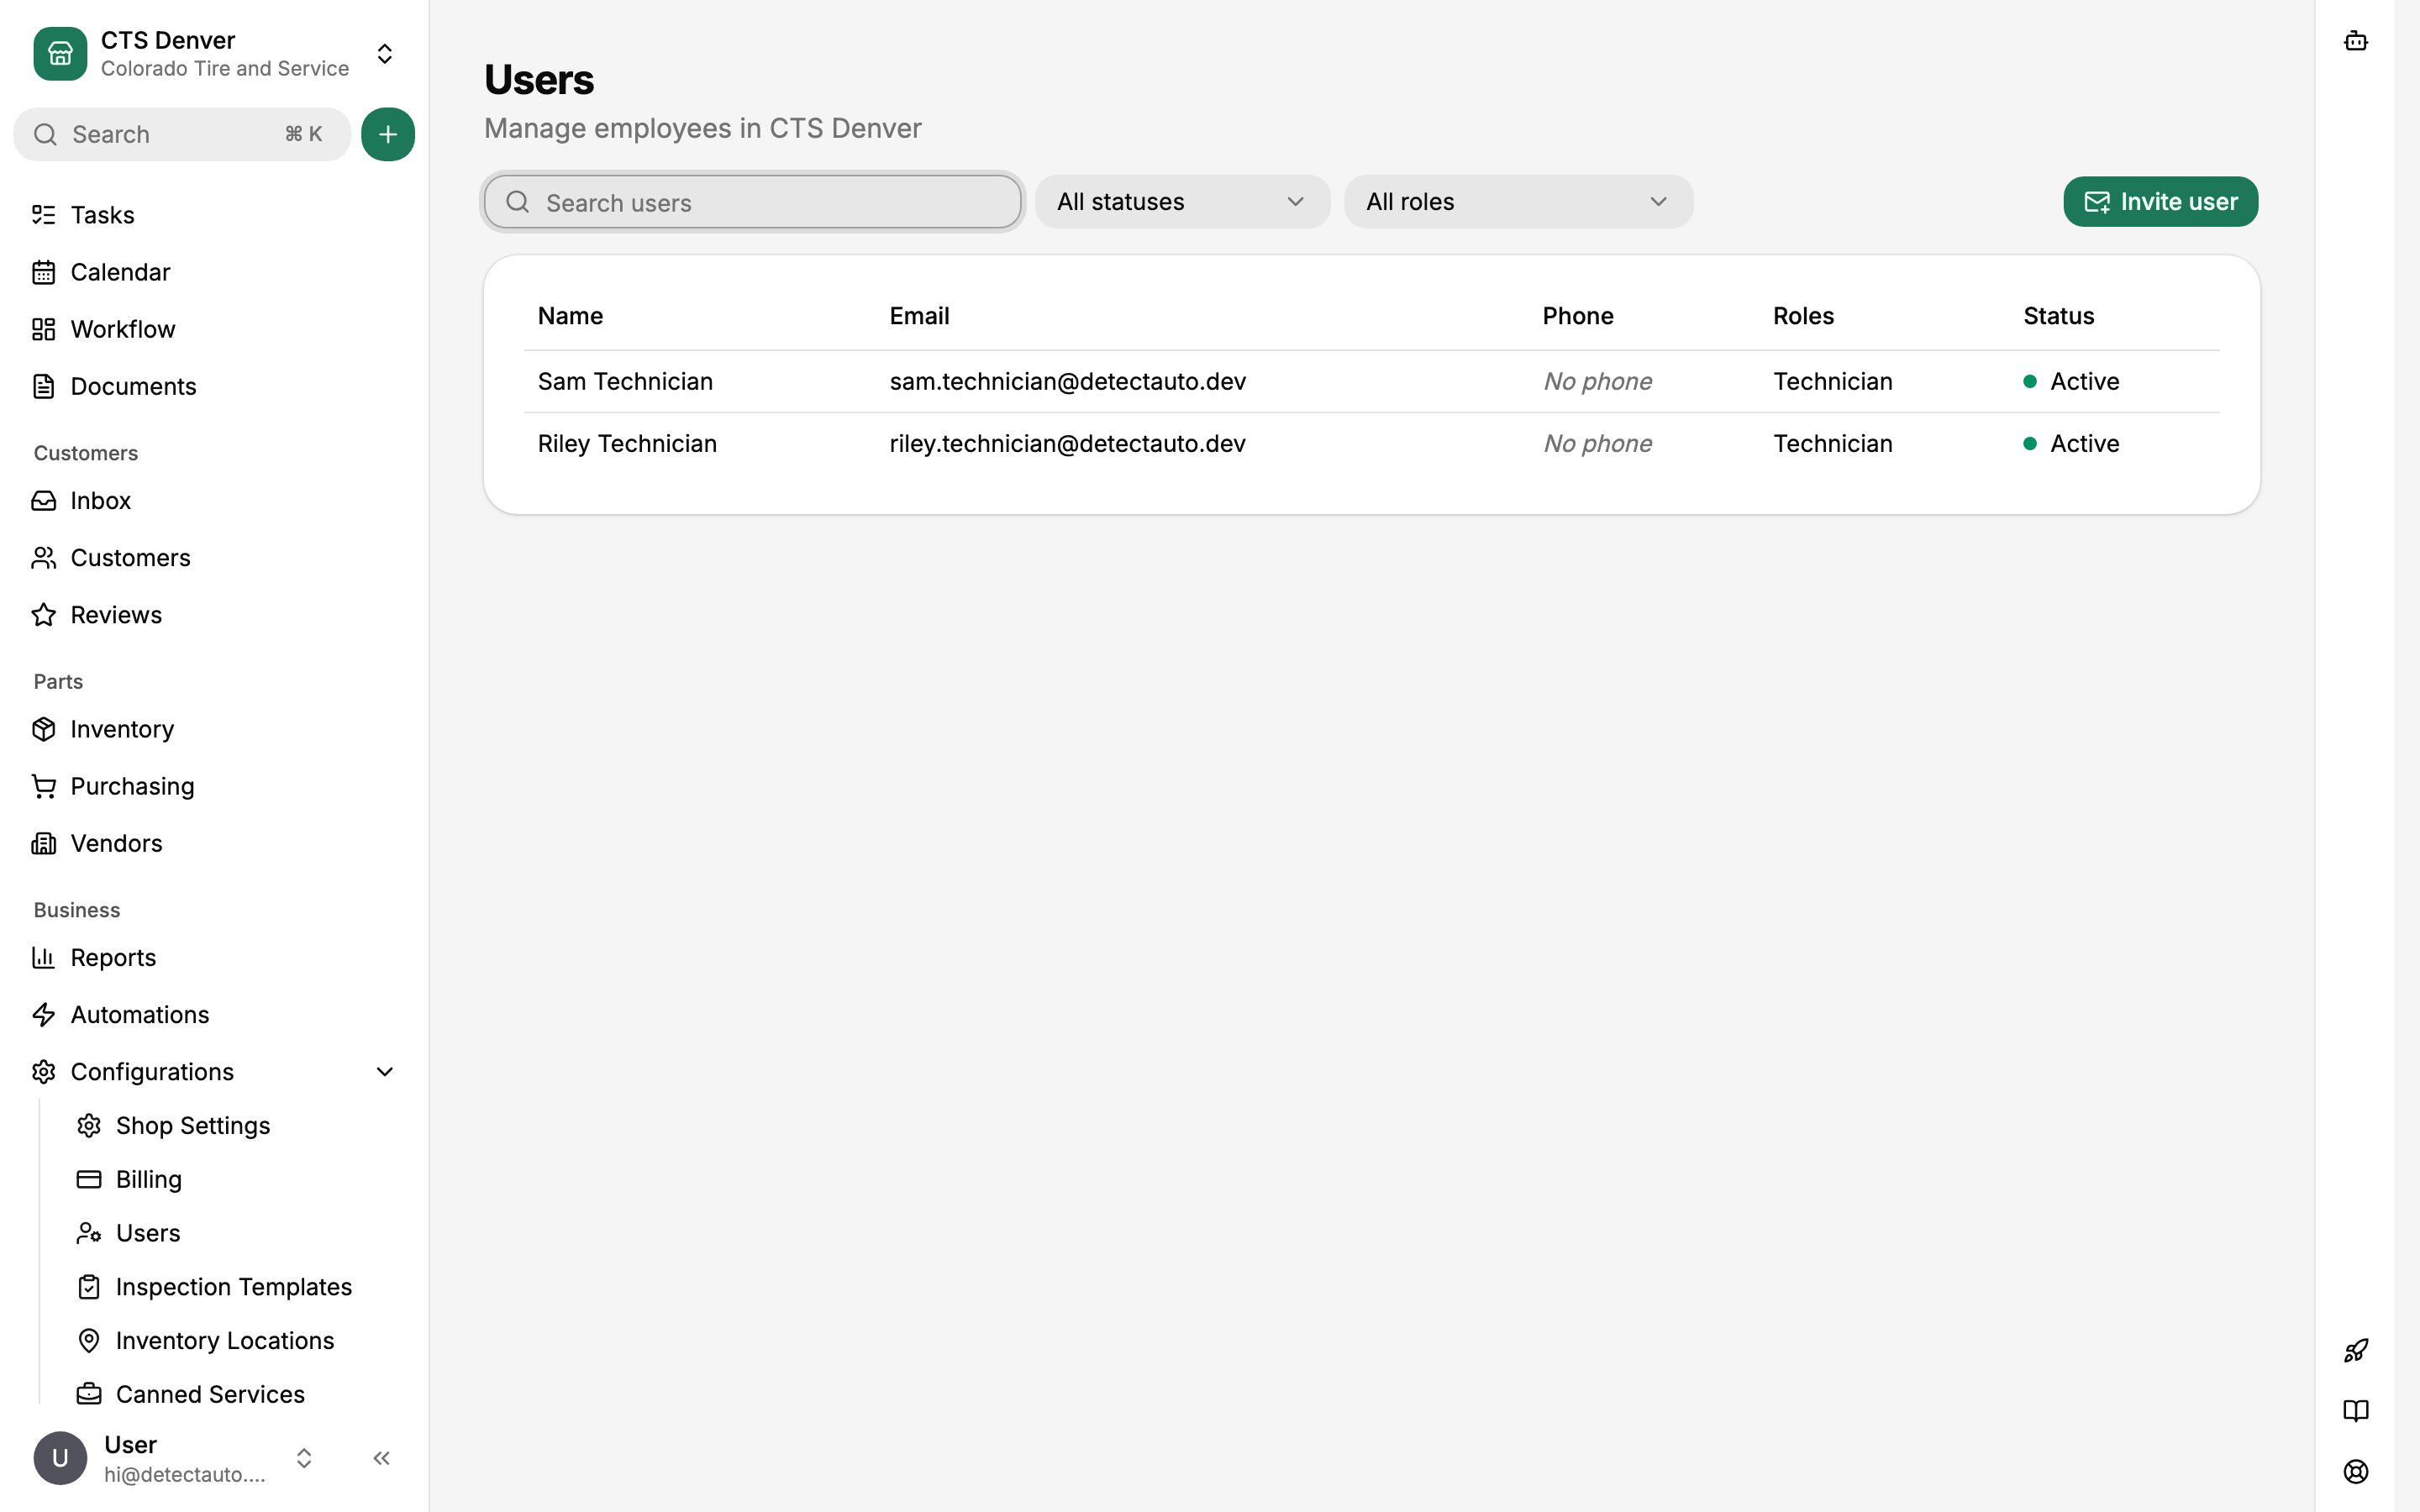
- Enter their email, name, and one or more Shop Roles: Technician, Service Advisor, or Shop Administrator.
- We email them an invite. They set a password and become active; until then they show as invited.
Roles are labels, but each one applies a sensible default set of permissions at invite time. Technicians can work repair orders and inspections but not take payments. Service advisors get customers, estimates, payments, and the calendar. Shop administrators manage settings, users, and permissions. To tighten or loosen a specific person, open their page from the Users list and edit their permissions directly.
Build inspection templates and canned services
These two pages hold the reusable content your advisors and technicians work from every day. A blank shop has neither, and both pay for themselves by the end of the first week.
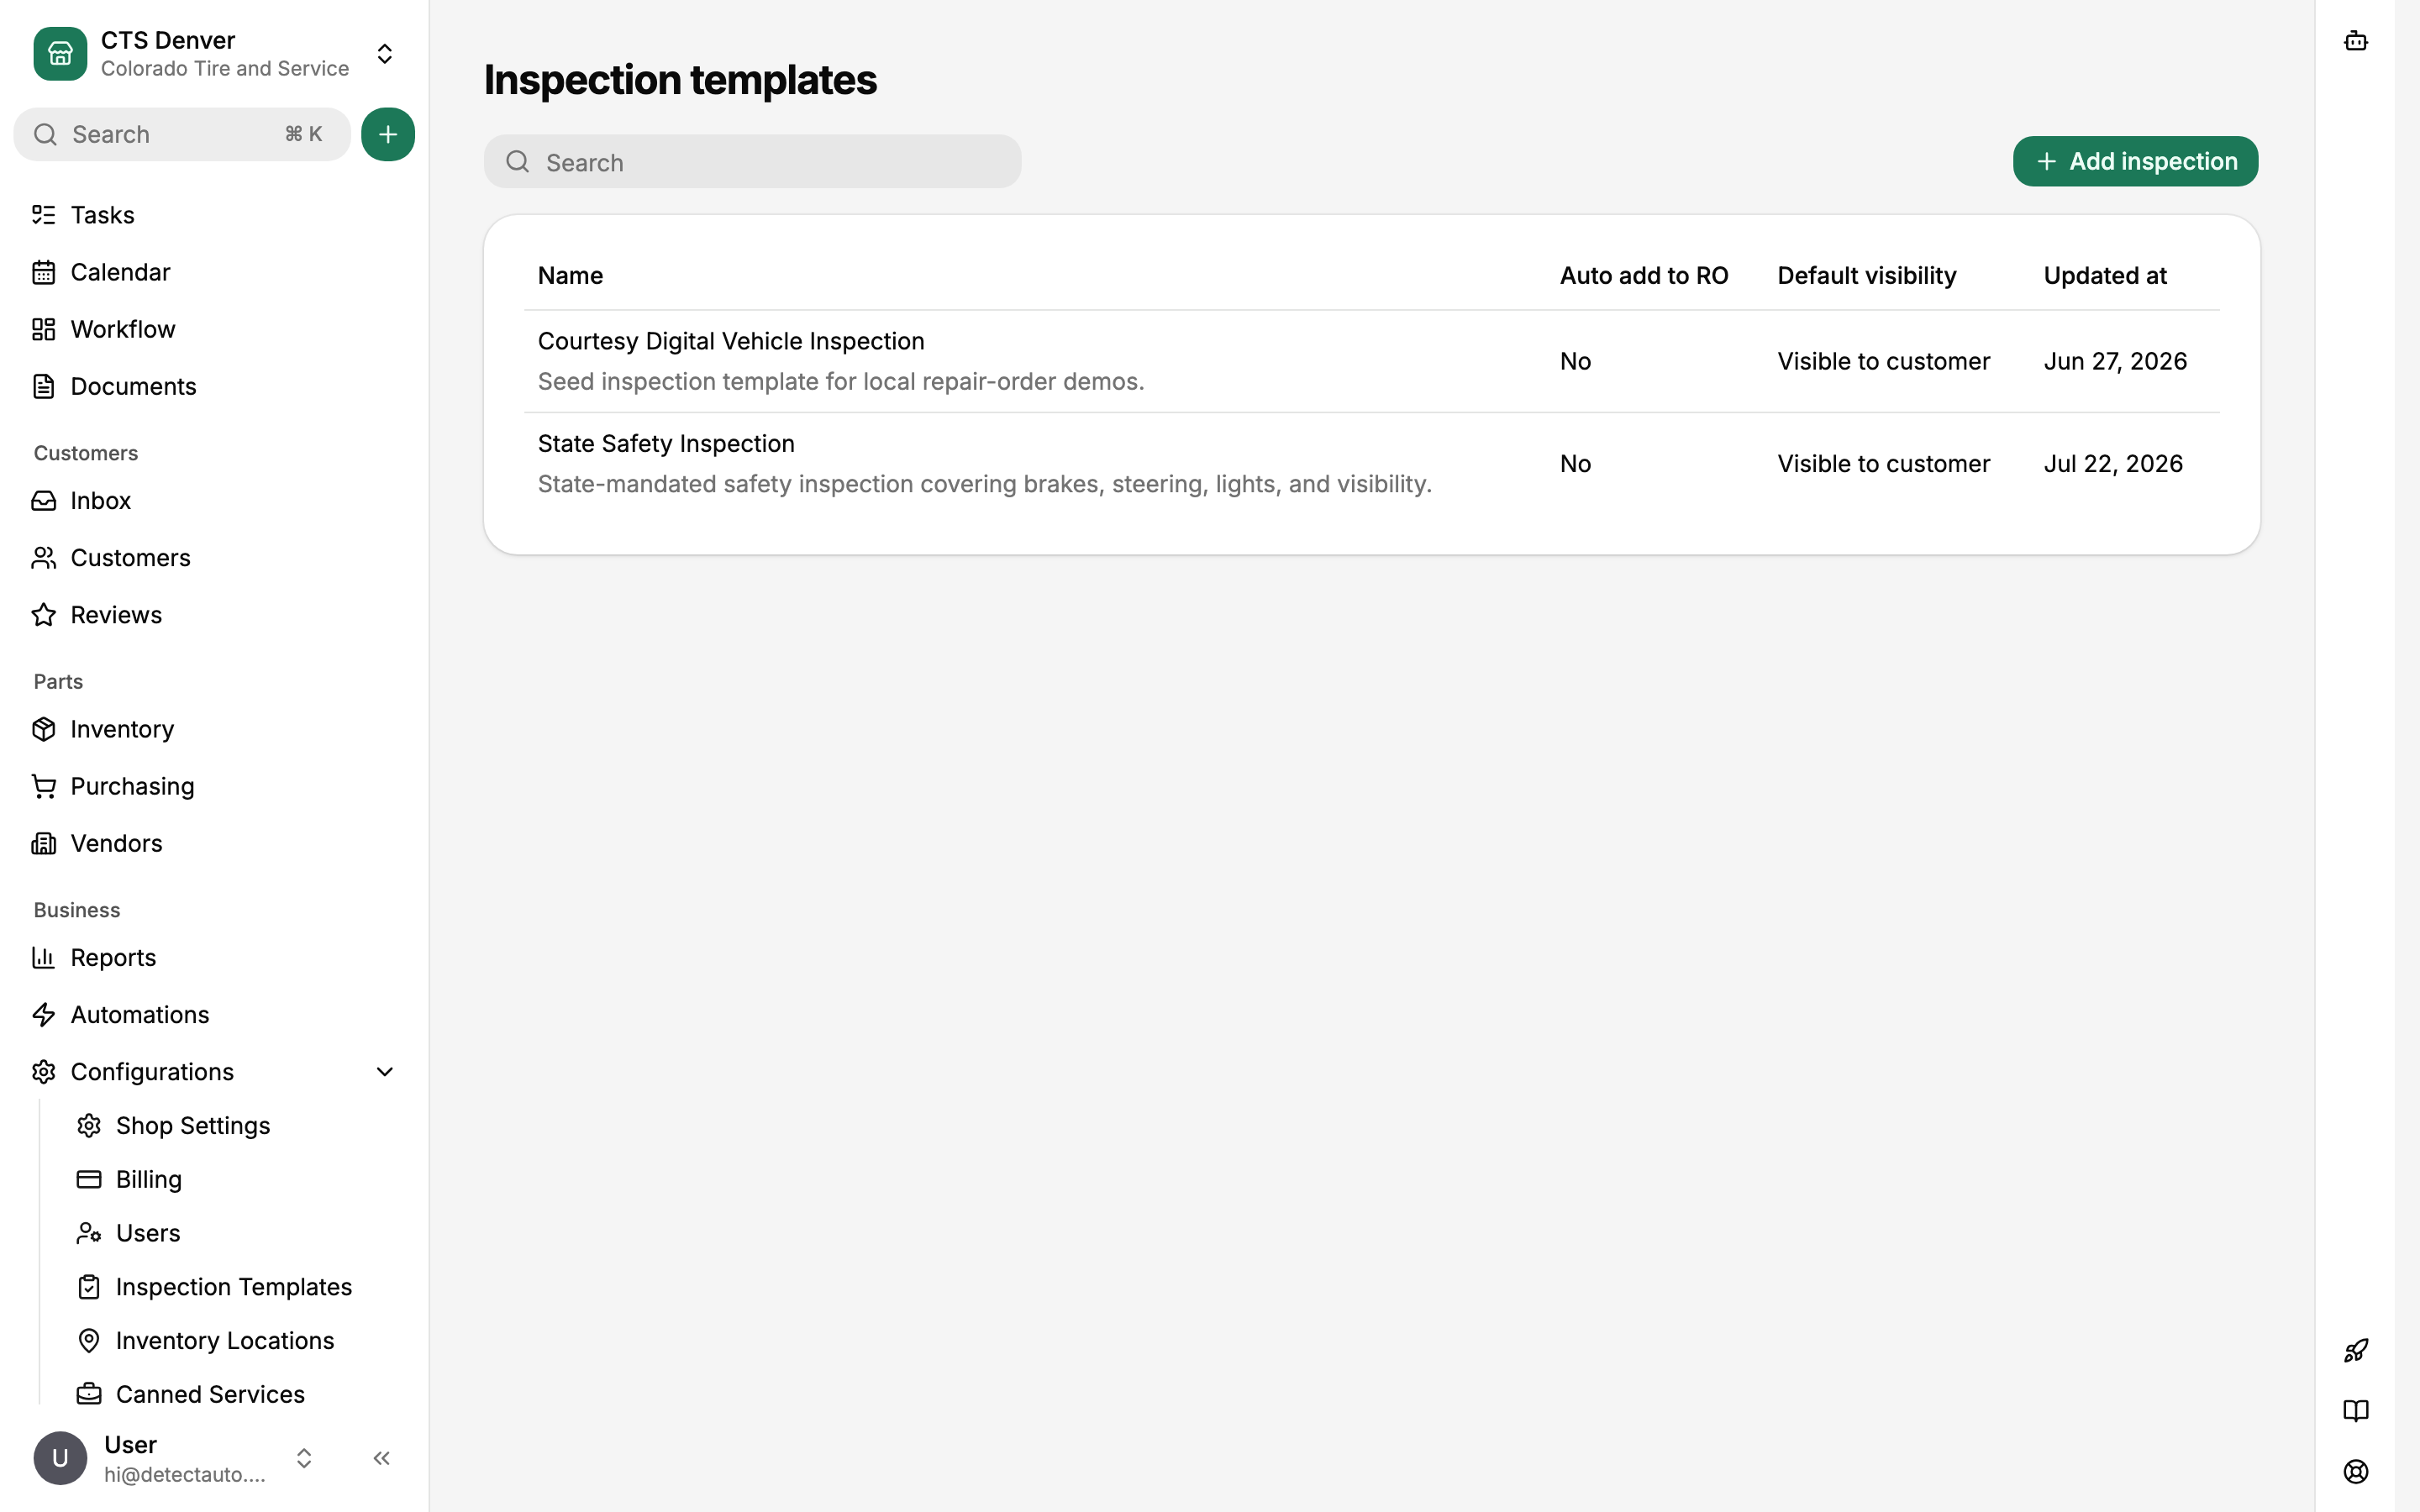
Open Configurations > Operations > Inspection templates. Inspection Templates are the checklists technicians fill out on a vehicle, organized into sections and tasks. Each template controls whether it's added to new repair orders automatically and whether results are visible to the customer by default. Build your courtesy inspection first; add state-mandated ones if your state requires them.
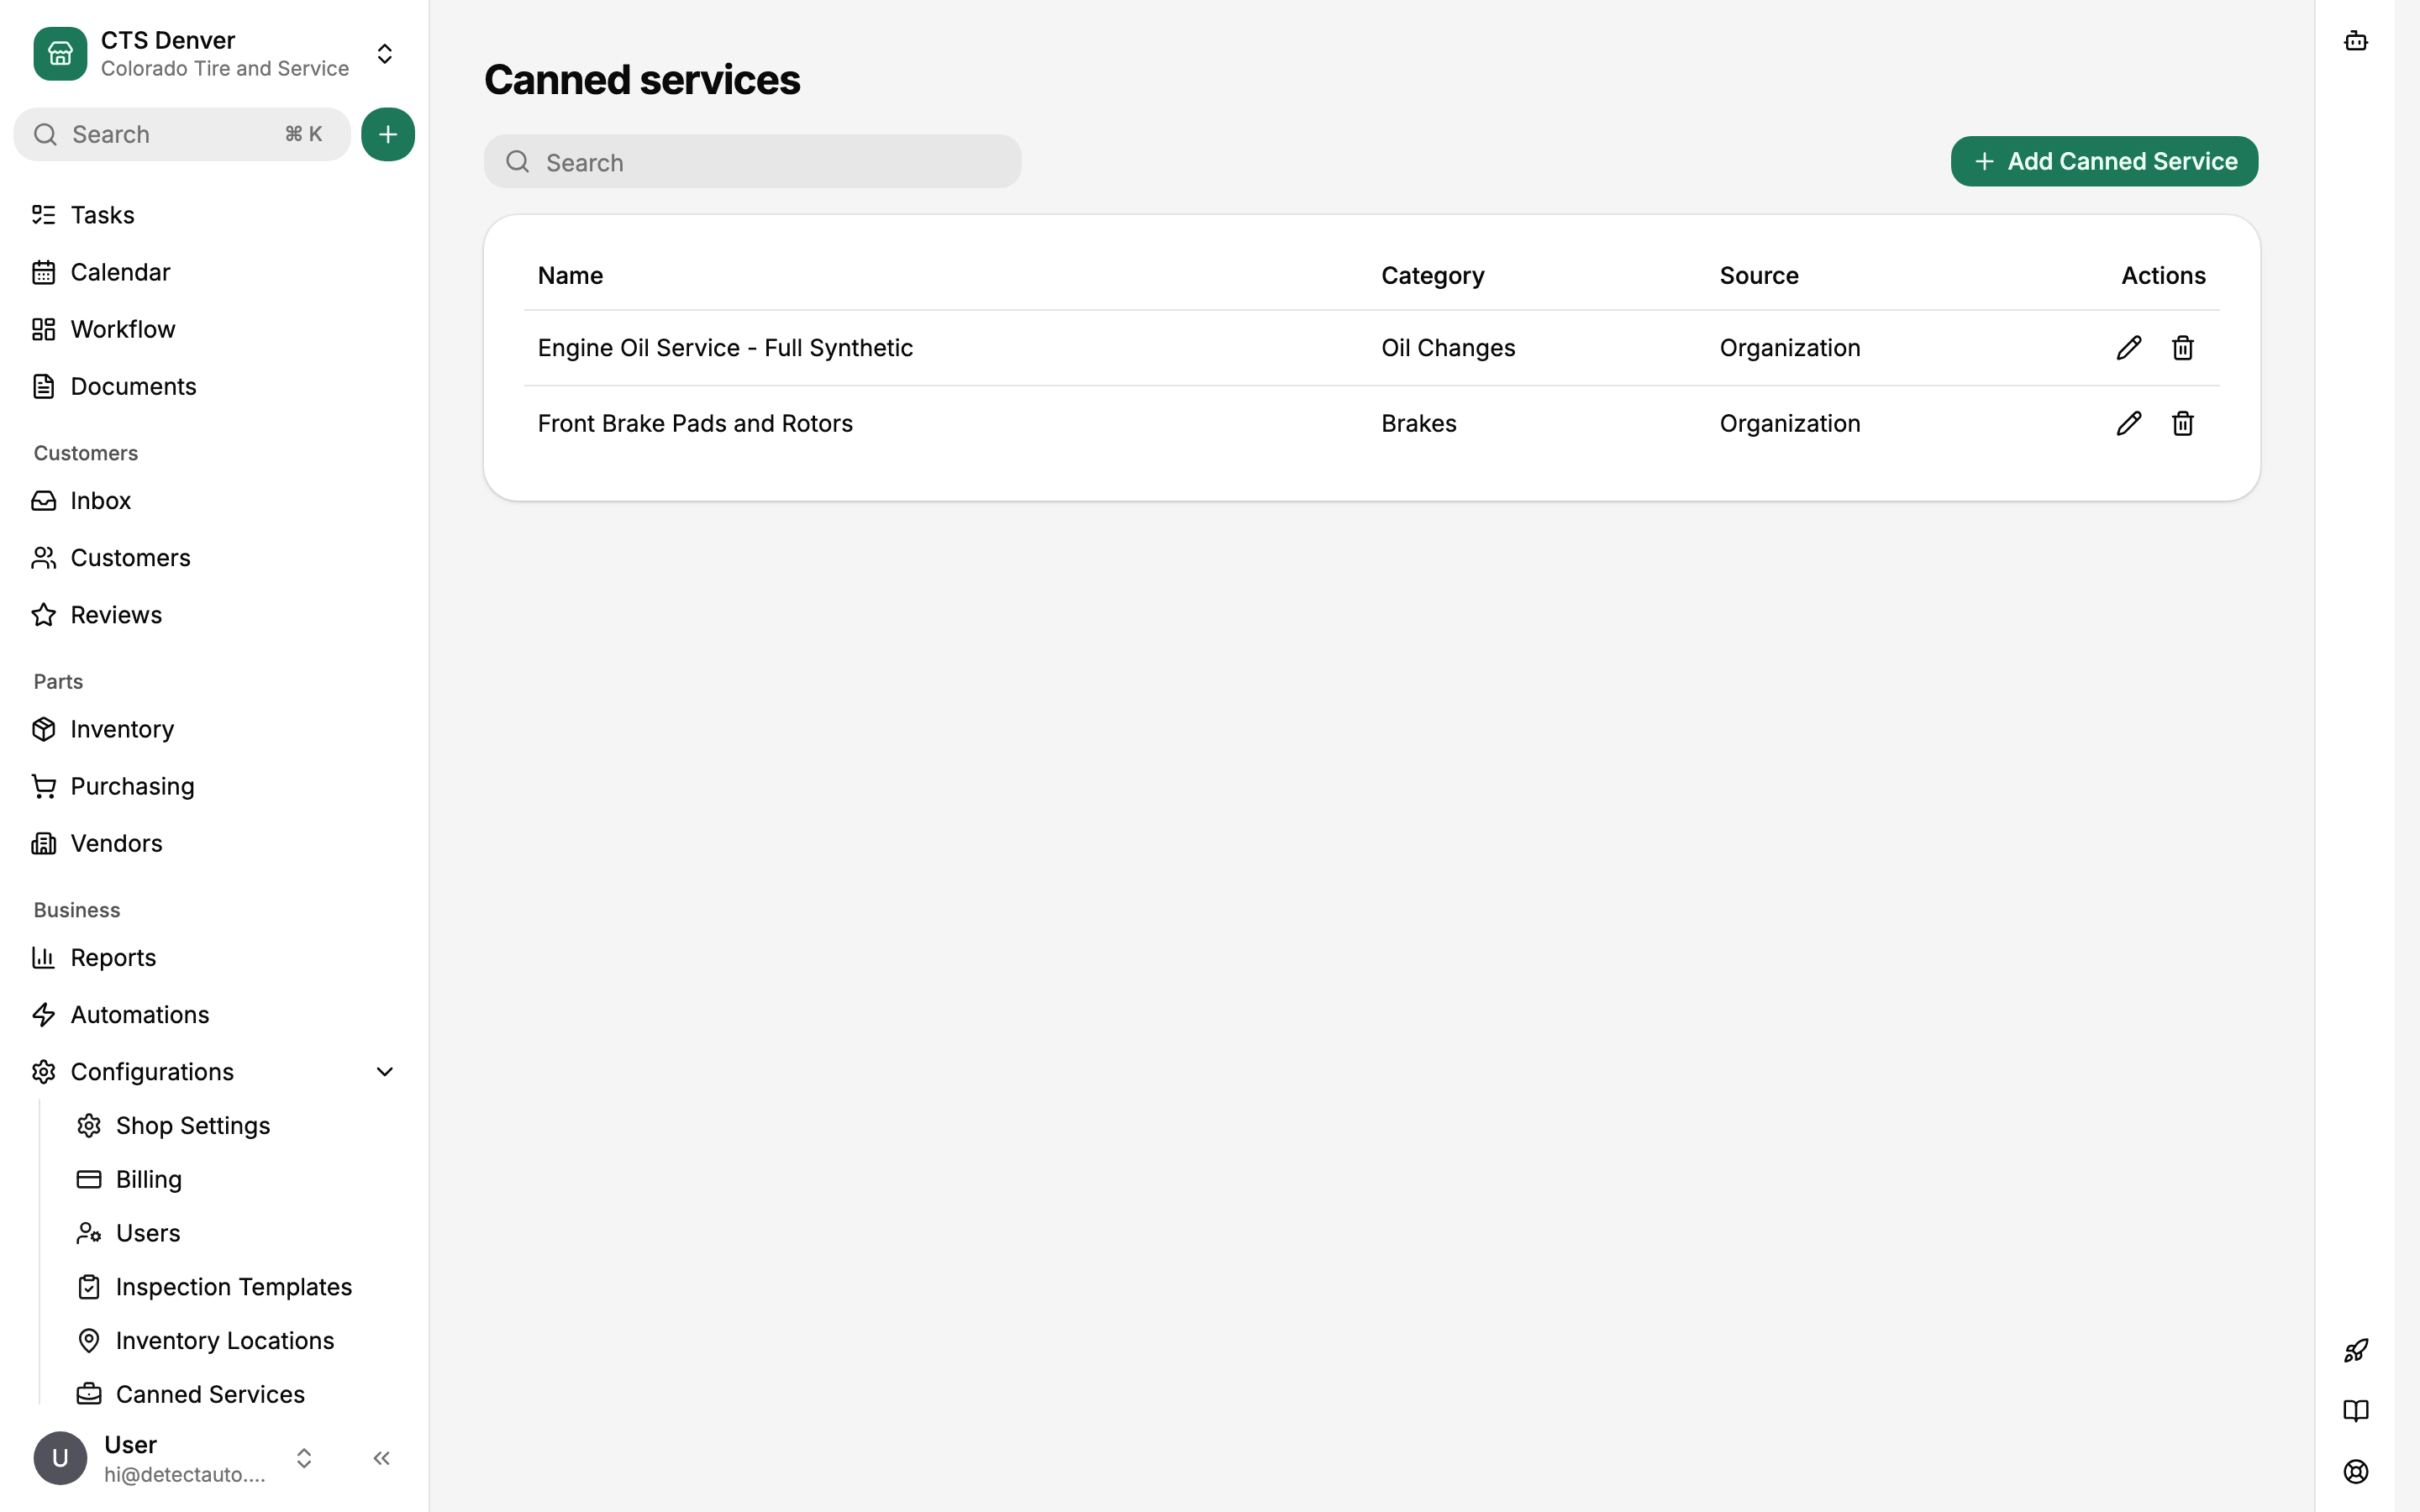
The neighboring Canned services tab contains prebuilt services (labor, parts, and pricing) dropped onto an estimate in one click. They belong to the organization, so every shop in your organization shares the catalog, and a shop can hide the ones it doesn't offer. Start with your ten most common jobs: oil changes, brake pads and rotors, tire rotation, and so on.
Set up vendors and inventory
If you stock parts, add your suppliers under Vendors in the sidebar and your stock under Inventory. The shop already has one default inventory location; add shelves, cabinets, or service trucks under Configurations > Parts > Inventory locations if you track where parts sit.
Bringing lists over from your old system: vendors and inventory (parts with opening quantities, costs, and locations) can be imported from CSV, but there's no import screen in the app yet, so contact support and we'll run it with you. There is no import for customers, vehicles, or service history. Customers and vehicles are created as they book, call, and check in, so your customer list rebuilds itself through normal work.
Organization defaults and shop overrides
If your organization has one shop, skip this section. If it has several, most settings groups (hours, labor rates, fees, workflow stages, and others) can either follow the organization default or be overridden per shop. Each section shows a badge naming its source, like the Org default badge on the workflow stages above. Organization-wide settings use the same five Configuration pages in Org view, reached from the shop switcher at the top of the sidebar.
Check that you're ready
Configuration pages flag anything that still blocks customer-facing work directly on the affected section, an unconfirmed tax config being the usual one. Clear the blockers, then go to the Workflow board and click Add repair order. If you can build an estimate, send it, and take a payment on that first RO, your shop is set up.
Not built yet
Billing is a coming-soon tab under Configurations > General. Reports appears in the sidebar but doesn't open anything yet, while Reviews is temporarily hidden. There is no self-serve data migration tool; imports go through support as described above.